WARDOGS / FIELD NOTES
Mortar fire missions from the map
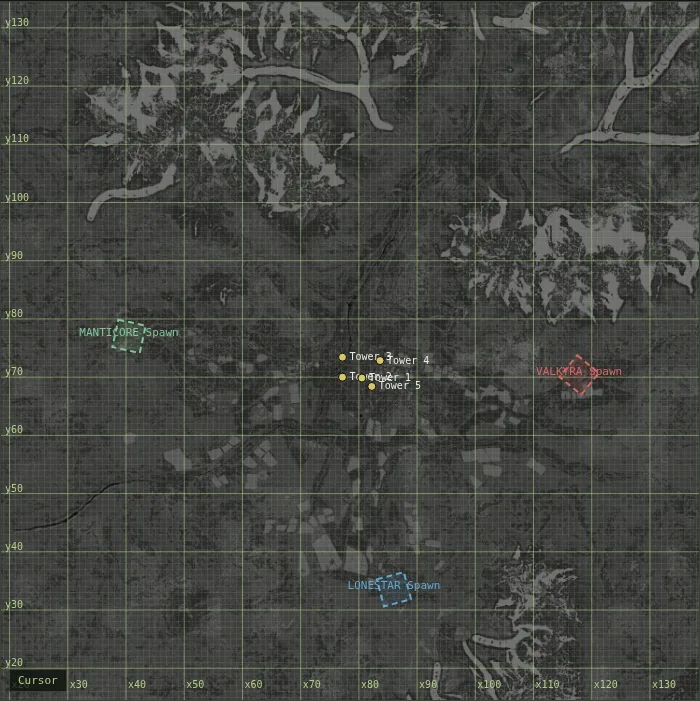
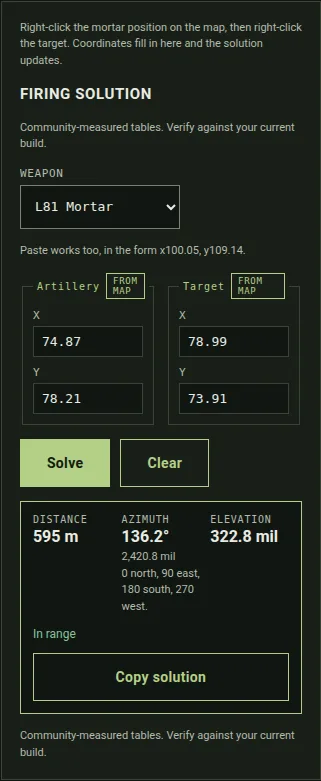
Wing Mait's tactical map can fill the artillery panel for you. Right-click the mortar, right-click the target, and the solution appears without touching a keyboard.
Quick card
- Set mortar
- Right-click the map, choose Set mortar here
- Set target
- Right-click again, choose Set target here
- Touch equivalent
- Long-press (about 500 ms), no movement
- Keyboard shortcuts
- M sets mortar, T sets target at the cursor
- Solver source
- Matches the community artillery calculator
- Height difference
- Not modelled by the solver
Step 1: open the map and find your mortar
Open the tactical map section and pick the map your match is on. Pan and zoom until you can see the ground position where your mortar is set up, since the fire mission uses whatever point you click as the gun's location, not your player marker.
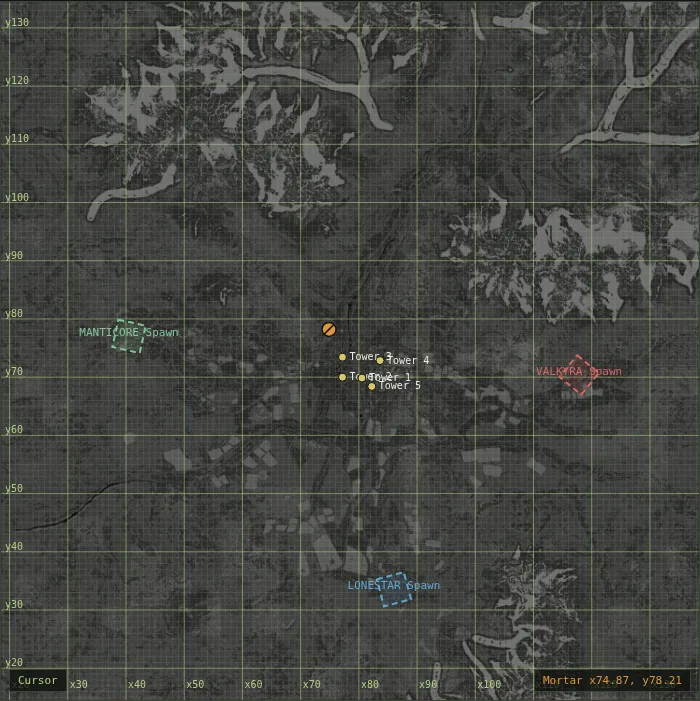
Step 2: right-click the mortar position and choose Set mortar
Right-click directly on your mortar's position on the map and pick Set mortar here from the menu that opens. The gun coordinates fill into the artillery panel immediately, and a mortar marker appears on the map at that exact spot.
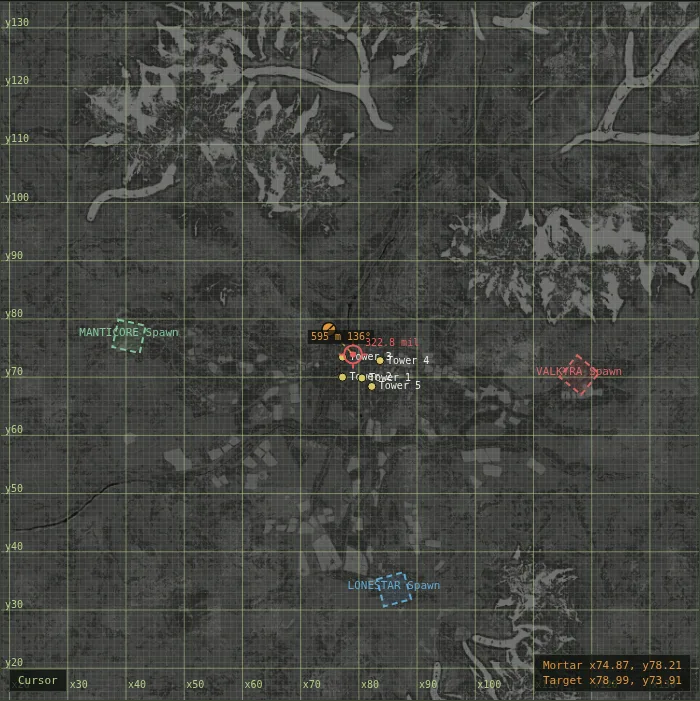
Step 3: right-click the target and choose Set target
Right-click the spot you want to hit and pick Set target here. A target marker appears, with a line back to the mortar labelled with the distance in metres and the bearing in degrees, so you can sanity-check the shot before you commit to it.
Step 4: read the solution, copy it, adjust for shell and arc
With both points set, the artillery panel solves automatically, no need to press Solve. Copy the solution with the panel's copy button, then adjust the weapon and arc (low or high) for the shell you are actually loading, since the same target can have a different elevation on each arc.
Touch and keyboard
On a touch screen, long-press the map (about half a second, without moving your finger) to open the same menu that right-click opens on desktop. With the pointer over the map, the M key sets the mortar and the T key sets the target at the cursor instead of opening the menu, and F fits the view back to the whole map if you have panned or zoomed away. The solver matches the community artillery calculator's own numbers, and it does not model height difference between the mortar and the target, so treat its elevation as a starting point and adjust for any real difference in altitude on the ground.
Related field notes
 WARDOGS10 Sep 2026Common mistakesFix common early mistakes with keybinds, weight class, medic supplies, leaning and FOB spacing, then review how APC placement changes team respawn options.FIELD NOTE 42
 WARDOGS10 Sep 2026Base raidingCompare C4 and IED requirements for walls, gates and FOB defenses, and use the guide's charge breakdowns to plan a cheaper breach before committing supplies.FIELD NOTE 43
 WARDOGS10 Sep 2026Money farming, ranked by riskA risk ladder covering every way to make cash in Wardogs, from parking a transport at spawn to fighting inside the Hot Zone.
Wing Mait is an independent project, not affiliated with or endorsed by WARDOGS or its publisher.