WARDOGS / FIELD NOTES
WARDOGS APC city: Whompin's three-floor keep for your APC
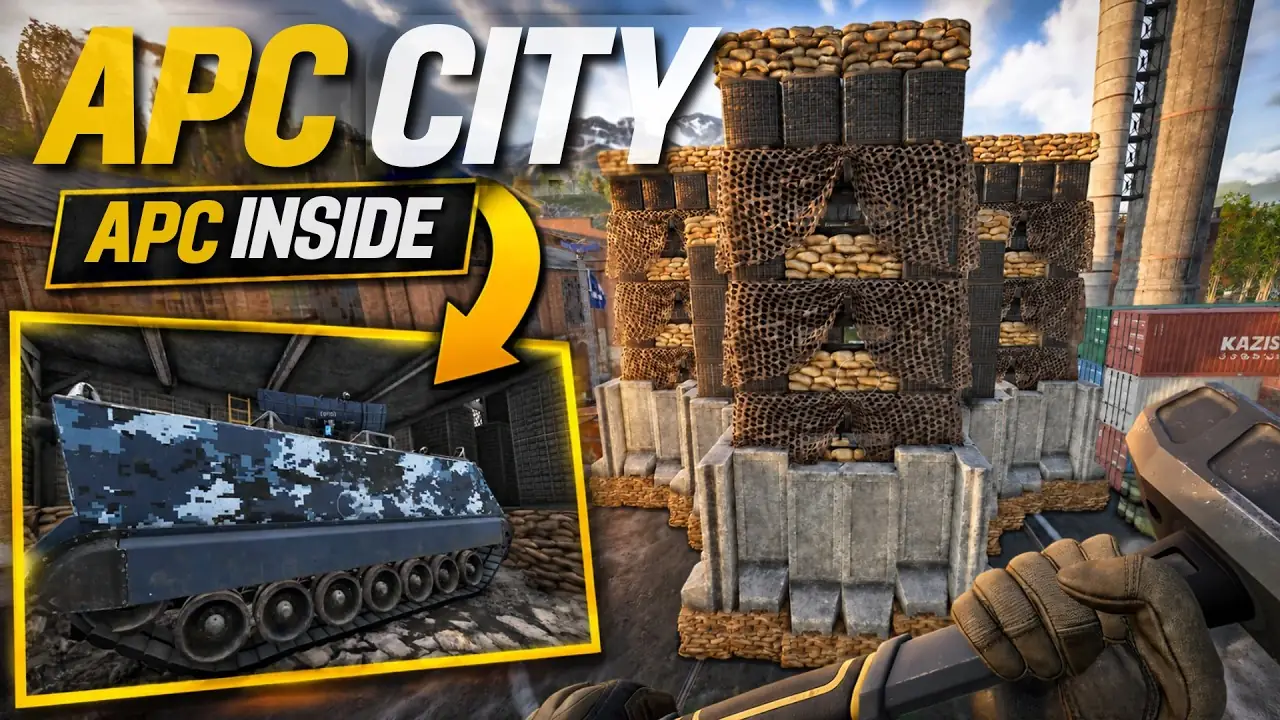
Whompin's case is that the APC is the heart of the battle and most teams treat it like a car in a shed. His answer is a keep, the last stronghold of a castle: a shelter ringed by four recon towers, an Indirect Fire Shelter that roofs the route upstairs, stacked bunkers for a second and third floor, and a way out that is never on the ground. We went through the full build, priced what we could at the Season 2 menu and set it beside our own building notes.
Quick card
- Idea
- the APC goes in a keep; spawners exit on the second floor or higher
- Frame
- shelter in the middle, a recon tower on each side, front left open for the APC
- Stair
- Indirect Fire Shelter placed flush, so infantry climb under a roof
- Floors
- bunkers stacked on the towers, a third floor slid into a Hesco and door ring
- Windows
- Hesco, not sandbags, behind the bunker windows
- Known bill
- about 1,006 before bunkers and walls
Why the APC needs a keep
Whompin opens with a history lesson. A medieval castle usually made attackers breach one or two walls, and behind them stood the keep, the last stronghold. His view is that the APC belongs in one. Too many teams park it outside or push it under a shed, and he wants the WARDOGS community to start treating it better. The rule that shapes the whole build: the way out of the APC shelter should not be on the first floor. Put it on the second floor or higher, so that when enemies breach, your spawners come out above them and can fight a last stand instead of walking into the attack. This is a long, one-take video, and he says so. He builds it slowly in the firing range to explain his thinking, and says he builds it much faster in a real match.
The frame: a shelter and four recon towers
He builds on flat ground in the firing range, starting with the metal shed in the middle as the base. Around it go four recon towers, one on each side, but only three at first. The front stays open until the APC arrives. His layout trick is to place the wall line a little wider than you need, using placeholders you will break later: a small Hesco with another small Hesco on top, left unbuilt, large Hescos snapped at the corners, and Hesco walls filling the gaps. When the frame is right, he opens all the Hesco walls and drops the recon towers into the gaps. Placeholders first make the real pieces faster to place. In real matches he usually builds one side against a church, with the church doors as one wall, which saves a tower and a lot of time. He adds that the whole structure works against a church or a warehouse entrance too.
The entrance tower and the ladder problem
The back recon tower is the spawners' way up. He takes its ladder out and makes it the entrance: people spawn on the APC at the bottom and use that tower to reach the second floor. Any recon tower can be a way up, but only if you remove its upper floor, and he likes keeping the floors. A ladder also obstructs anything you try to build above it, which matters because he wants the second and third floors fully enclosed. So he picks one tower as the stair and builds the others up with large Hescos and a door where the ladder would be.
The Indirect Fire Shelter stair
This is the part he is proudest of. He lines up a Hesco block, turns snapping off, and places an Indirect Fire Shelter flush against the towers, so infantry move up to the second floor with a roof over their heads and no gaps. He shifts it to one side so the entrance side has no gap at all, and covers the remaining gap with a door. He warns that it is fiddly and that he does not get it first time every time. In the video he forgets a step and has to redo it. After placing the shelter, look underneath. If anything protrudes below, it blocks the APC and the people spawning on it, and the fix is to remove the shelter's flooring. If a piece says obstructed for no clear reason, his advice is to pick it up and place it again.
Stacking bunkers into a second and third floor
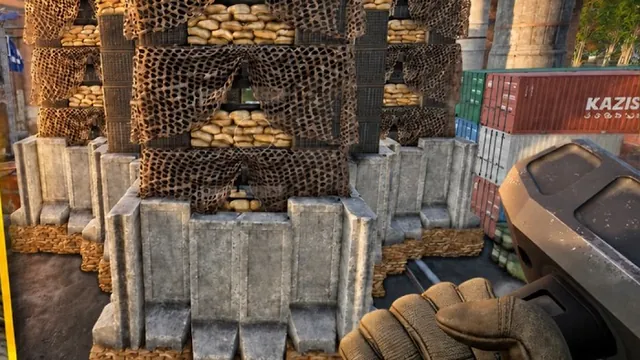
By the time the Hesco placeholders come off, he reckons there are usually 15 to 20 tickets on the map and the APC is about to spawn. The front stays open until the APC is locked in, then the last tower goes up. On the roof he stacks bunkers. Three bunkers stacked is a known limit, but because these sit on top of the recon towers, the stack goes higher than anything you can build from the ground. He calls it the highest bunker tower in the game. A layer of bunkers goes on each side, then a second layer. The third floor is the clever part. He rings the inner space with large Hescos and doors, leaving exactly enough room to slide a bunker in, and rotates it so its entrance faces the side he wants. From that floor you can enter all four towers. The doors can be laid sideways so players crawl under the bunker's sandbag lip more easily.
The chute and overhead cover
To reach the top he builds a small chute on the side with the most spare room: open a wall, build it back up with large Hescos, and offset a sandbag to jump up on. He leaves the door off the chute because a door there would get in teammates' way. He expects the obvious objection, that one mortar down the chute ends it, and agrees it is exposed. His fix uses a rule worth knowing for any build: Hescos and many other buildables only need three supported edges to stay up. Sit a Hesco on just three edges, build it, then remove what is under the fourth, and you get an overhang. Repeat it with sandbags and Hescos and the chute has a roof while you can still climb it.
Will it get mortared?
His answer comes in two parts. First, mortar players tend to aim at targets that pay, like SAMs and CIWS. Most of them have no idea what this structure is, and he thinks few will bother with it. Second, if they do, there are three levels of cover, and anything blown off the top, including the top bunkers, can be rebuilt as long as you have supply. He also hits stack limits as the walls rise. When the tall Hescos stop stacking, he switches to small ones and keeps going. You can stop lower and leave a corner peek if you prefer.
The roof: SAM, steps and an LMG spot
The rooftops are open to whatever you want. He drops a SAM up top and builds steps so you can come up and peek over the edge. A CIWS will not fit up there, by his test. His LMG spot has a set order: sandbag down first, then a step set a little back, then the LMG, so you have cover from your feet to your waist and a good range of motion. Lift the gun slightly if it clips the sandbag.
Hesco behind the bunker windows
He calls his relationship with sandbags love-hate. They go up fast and blow up fast, and then you are exposed. Inside the bunkers he uses Hescos instead to close off the angles he does not need, such as the back of a tower that already has plenty of other angles, so he only has to watch one or two sides. Two small tips: a sandbag set lower with a step behind it lets you see straight down below you, and an unbuilt sandbag gives you something to look over. If the sandbags go and you are out of supply, the Hescos still cover you, and a teammate can drag you out if you go down.
Walls, peek spots and locking the keep
The outer wall is Bremers, with his signature step-out at the corners. Where a Bremer would block a tower window, he uses a sandbag technique: place a sandbag against the wall, build the Bremer resting on it with snapping off, and the wall stays low enough to see through the window above. On the ground floor you can open a Hesco in each recon tower to make peek spots, angled so two towers cover the same approach and anyone walking past is caught in a crossfire. He usually prefers to fill the towers with large Hescos so nobody can breach them, but shows the peek spots for the video. The point of the keep comes at the end of his tour. When enemies get in, lock the back door and fight from the upper floors. He also builds exits off the upper floors, so once the attack is cleared you can jump down and revive teammates without opening the ground floor.
How this fits with what we have written
This section is our view, not his. We have also published the opposite philosophy: Ryan an the world's drill-first FOB, which says most blue teams lose on time and should get a drill pulling before building anything fancy. Whompin's keep is a 50-minute video of the opposite instinct, and both have a point. The way we read Season 2, they work best together: one or two players get drills up and fuel moving while a builder who knows this layout raises the keep, timed to have the front ready when the APC arrives. If the whole team builds the keep and nobody drills, green gets its points. It also lines up with RadioGLHF's APC garage: build the APC's home before the APC turns up, and keep the spawn inside the base so respawns go straight back into the fight. Two cautions. Whompin's earlier bunker build was patched in Season 2, and this one leans on stacking and placement tricks, such as bunkers stacked above the usual limit and a shelter placed with snapping off, that could change in a patch. Test it in the firing range before you plan a match around it. And it is a lot of pieces: price it before you commit your supplies. Where Wing Mait fits: it calls out contacts with bearing and distance from what is on your screen, and our mortar calculator gives a firing solution. It does not place Hescos for you.
Step by step
This is our write-up of the build in his video, with Season 2 menu prices where we have them. 1. Pick flat ground, or a church or warehouse wall to build against. 2. Place the metal shed in the middle (we read it as the Large shelter, 201). 3. Lay the wall line a little wide with Hesco placeholders: small Hescos (13) stacked unbuilt, large Hescos (19) at the corners, Hesco walls (61) in the gaps. 4. Open the gaps and place three recon towers (161 each). Leave the front open for the APC. 5. Make the back tower the entrance: take its ladder out, close the others with large Hescos and a door (65). 6. Place the Indirect Fire Shelter (161) flush with snapping off, then check that nothing protrudes underneath. 7. Stack bunkers (161 each) on the towers, one layer per side, then a second layer. 8. When the APC is in, add the fourth tower. 9. Build the chute and give it overhead cover with three-edge Hesco overhangs. 10. Ring the inner space with large Hescos and doors and slide a bunker in for the third floor. 11. Fit out the roof: SAM, steps, the LMG spot. 12. Swap sandbags for Hescos behind the bunker windows, then build the Bremer outer wall (27 each) and any peek spots. The pieces we can count, the shelter, four recon towers and the Indirect Fire Shelter, come to 1,006. The bunkers, Hescos, doors and walls come on top, and he does not give counts, so we have not totalled the whole keep. You can lay it out and price it in our base builder.
Sources and what we are unsure of
Everything about the build comes from Whompin's video, published 3 November 2026, on the channel youtube.com/@Whompislife. We worked from the video's full caption track, not frame by frame. In a build this fiddly, placement is everything, so watch his video for exact positions. The prices come from the Wing Mait team's reading of the Season 2 menu on 17 October 2026. A later patch may have moved them. Our readings: metal shed as the Large shelter, Sam as the Talon 9K-SAM, Sea Wiz as the Vanguard CIWS. He says LMG for the roof gun, and we have not confirmed which piece that is, so we have not priced it. The 15 to 20 tickets timing, the stack heights and the view that mortar players ignore the keep are his observations, not our tests. If your game shows something different, tell us on Discord and we will fix it.
SOURCE BRIEFING
Source video from WhompinI Built an APC CITY in Wardogs! (Full Build & Design Process)
Watch on YouTubePlaying loads YouTube. Choose captions in the player settings. Credit and thanks to the creator.
Related field notes
 WARDOGS3 Nov 2026Drill-first FOB: build fast, pull pointsTwo drills, a repair closet between them and one CIWS seat, built before green is halfway to 100. From Ryan an the world's video, priced at the Season 2 menu.FIELD NOTE 06
 WARDOGS25 Oct 2026Season 2 wipe: The Hotzone Ep 1BULKHEAD's podcast on the Season 2 wipe: the Lone Star bonus, the tank snowball, an XP system built as an MVP, Intel in Q2 and three-month seasons, with timestamps.FIELD NOTE 07
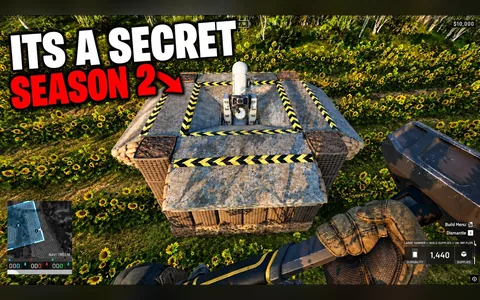 WARDOGS21 Oct 2026The secret CIWS sunflowerWhompin's Season 2 CIWS build: a bunker, a ring of Hesco petals and a gate roof propped up on M2 Brownings, so you sit under the mortars and repair from inside.
Sources
Numbers and mechanics on this page are paraphrased from:
Wing Mait is an independent project, not affiliated with or endorsed by WARDOGS or its publisher.