Bravo 4 Field Tips, No. 1
A castle without borders
Listen up. A castle never started with a wall. It started with the keep, then the outhouses, and the perimeter came last, once there was something inside worth holding. Your FOB works the same way.
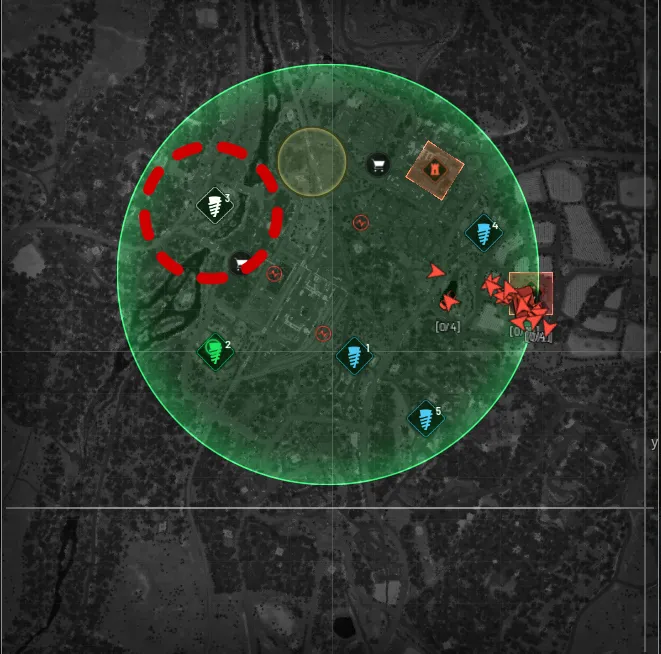
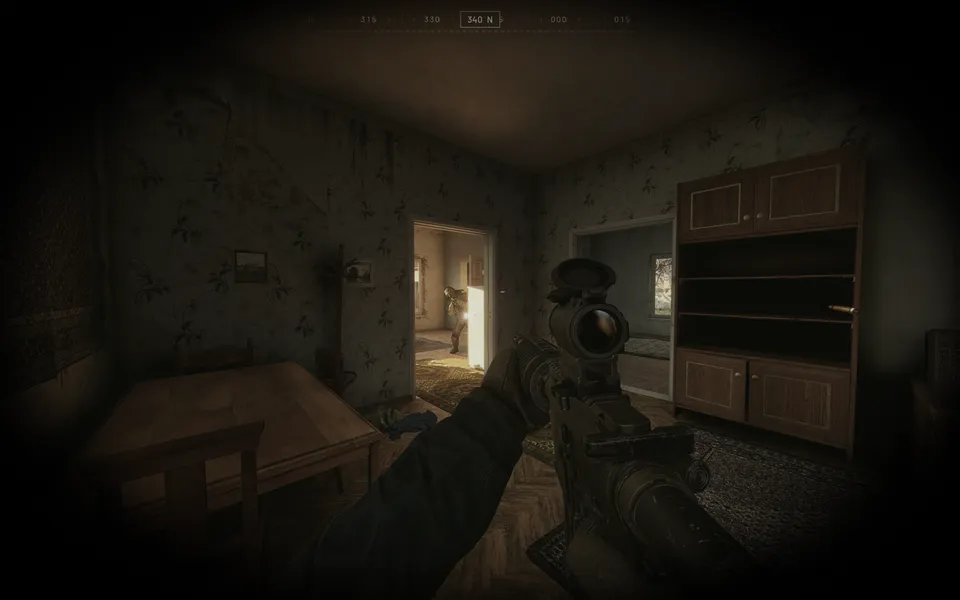
Quick card
- Format
- Doctrine, not a build recipe
- Core idea
- Keep first, perimeter last
- Build order
- Keep, outhouses, cells, perimeter
- Cells to build
- One per player on the server tonight
- AA layers
- Crate, wheels (vehicle turret), corners (CIWS)
- CIWS status
- Needs the higher hammer tier; not yet a sourced build in the library
- If it falls
- Abandon it, don't die for it, take it back later
The square is a promise you can't keep
A square FOB is a medieval idea. One perimeter, one airlock, every wall an equal target, everyone you've got inside the same hundred metres. It looks strong from the inside. From the outside it's a promise: the fight will happen at your wall, on the attacker's schedule, and when the airlock goes, everything behind it goes with it. That's the ground truth. Now look up.
The thing that actually kills you has rotors
The threat that ends bases isn't a squad at the gate. It's an Apache. And against a gunship, being grouped up is the mistake. A square gives the pilot one target, one run-in, one blast radius with your whole team inside it. You can build the walls twice as thick and you've changed nothing that matters to him. So the answer is not a better square. It's no centre of mass at all.
A castle never started with its wall
Here's the part the square builders skip. The thing we call a castle was never built wall first. Krak des Chevaliers is the textbook case: the inner castle went up between 1142 and 1170, and the outer walls were among the last major work, added once there was something worth wrapping. Beaumaris shows the other side of the ledger. The builders put their money into the inner walls from 1295, and by 1300 the outer defences were still missing on two sides. It was never finished, and that's the money lesson in stone. Even the humble motte and bailey, thrown up fast and cheap in earth and timber, got its keep and gatehouse rebuilt in stone first once the owners could afford it. That's not a fixed rule for every earthwork, but the instinct is the same. For us the order is: keep, then outhouses, then the ring, and the ring only when there's something inside that can hold it. Nobody starts with the chunky perimeter. Nobody sensible, anyway.
Krak des Chevaliers → Beaumaris Castle → Motte-and-bailey castle →
Soldiers had a name for it
Defence in depth is the plain-language version. You don't expect to stop the attacker at the edge, you make every layer cost him time, and the concentric castle is the classic picture of it. The hedgehog is the same instinct as a formation: strongpoints that back each other up and keep fighting even when the enemy walks round them. A ship gives you the cell idea in its purest form. A breach floods one compartment instead of the whole hull, but only if the bulkheads between them hold. Every one of those is a design that expects to be hit. That's the design brief for a FOB.
Others got here first
None of this is new, and we'd rather say so than pretend. Plenty of WARDOGS builders reached for the same order before this column. Ali Amir at KeenGamer says build inside out so losing a wall doesn't expose your supplies: core, gates, outer perimeter, then wire and towers, then mortars and AA. Luke Kyle at G2A News says the same in a different key: protect the FOB first, expand second, and only add mortars and AA once the base survives without them. The WARDOGS Wiki editors add the sharp point that a perimeter with no supply team behind it is an empty shell, and that a tower-side FOB and a remote fire-support FOB are different jobs. Haider at GamesFuze makes corner bastions the core, each overlooking the next, and the wardogs.fit layout anchors on a tower and spreads derricks so one splash doesn't chain through them. Other games rhyme too. Shockbyte's Rust guide says start small, secure the core, then grow it in honeycomb layers, and Corrosion Hour's 2x1 starter is a whole base plan that begins as a tiny shelter and expands. The Arma Reforger fortification guide puts logistics first and fortifications last, and tells you to keep a second prepared position to fall back on. The Foxhole wiki describes bases that upgrade through tiers from a bunker network. What we're adding is the cell layer, and build plans to go with it.
KeenGamer, FOB layout and build order → G2A News, base building guide → WARDOGS Wiki, FOB guide → GamesFuze, best base → wardogs.fit, FOB defense layout → Shockbyte, Rust base design → Corrosion Hour, 2x1 starter → XGamingServer, Arma Reforger fortifications → Foxhole wiki, Bunker Base →
The honest counterpoint
To be fair to the sceptics: real forward operating bases usually go up wire and gate first, because real engineers have days and heavy plant. You've got a hammer and a few minutes, and the first thing that dies in those minutes is whatever you spent them on. That changes the order. Wire first is right when you can afford to finish it, and in WARDOGS you usually can't.
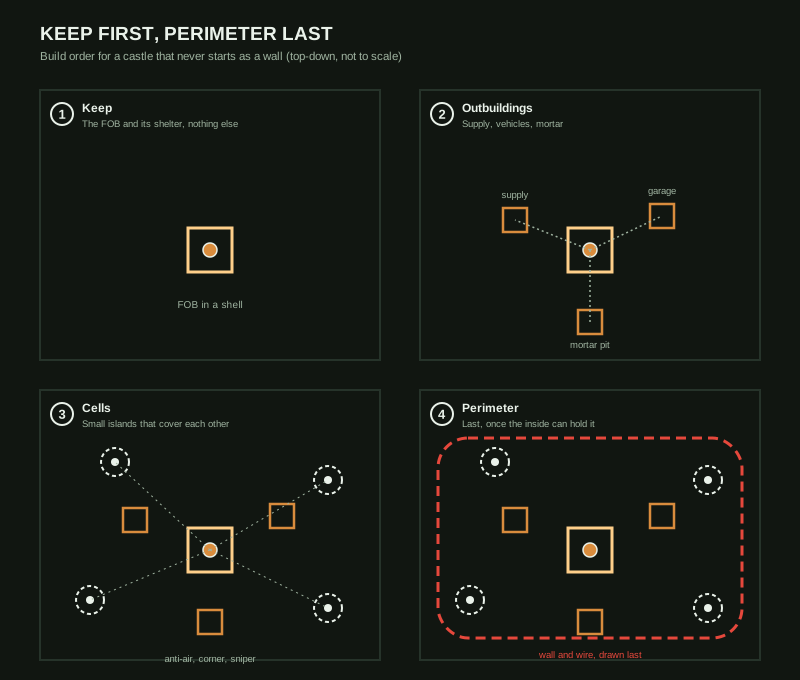
Phase one: the keep
The keep is the FOB and the shell around it. Start with the Indirect Core Shell from the build library, in preview: you freehand the first shelter, remove its starter block, then snap the rest closed into a repairable shell around the FOB. If you want everything to land exactly, the Foundation Snap lines up the FOB and the recon tower so the rest of the base snaps into place, and the Airlock Entrance gives the keep its door, two holes and two doors where each door costs an attacker its own C4. Build nothing else until a squadmate can spawn, heal and re-arm behind that shell. If the keep can't do that, no wall will save it.
Phase two: the outhouses
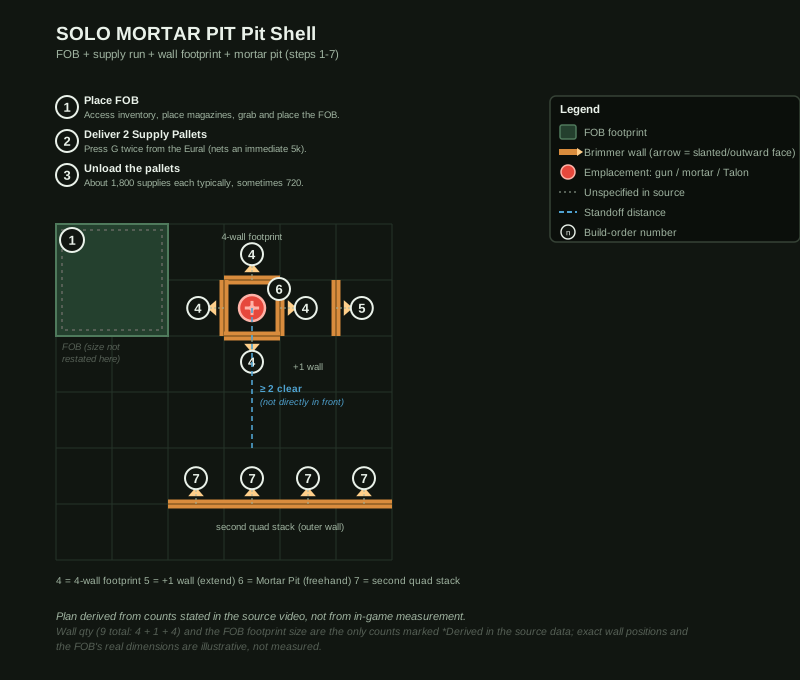
A castle had stables, storerooms and a well. A FOB has the same jobs. Supply comes first: the Logistics Gate from the library, in preview, is hesco blocks, bunkers, gates and wire for 950 Build in total, about half a supply pallet, so pallets can come in without the base being a fortress. Next the Vehicle Garage, two mirrored Indirect Fire Shelters, cleared out and gated, snug enough for an APC. Then the mortar, as an outhouse rather than an afterthought: the Pit Shell is a mortar pit with a compact wall footprint that one player can build solo from a single supply run. Put the guns in once the keep works. None of these needs the perimeter to exist yet.
Phase three: cells, not a centre of mass
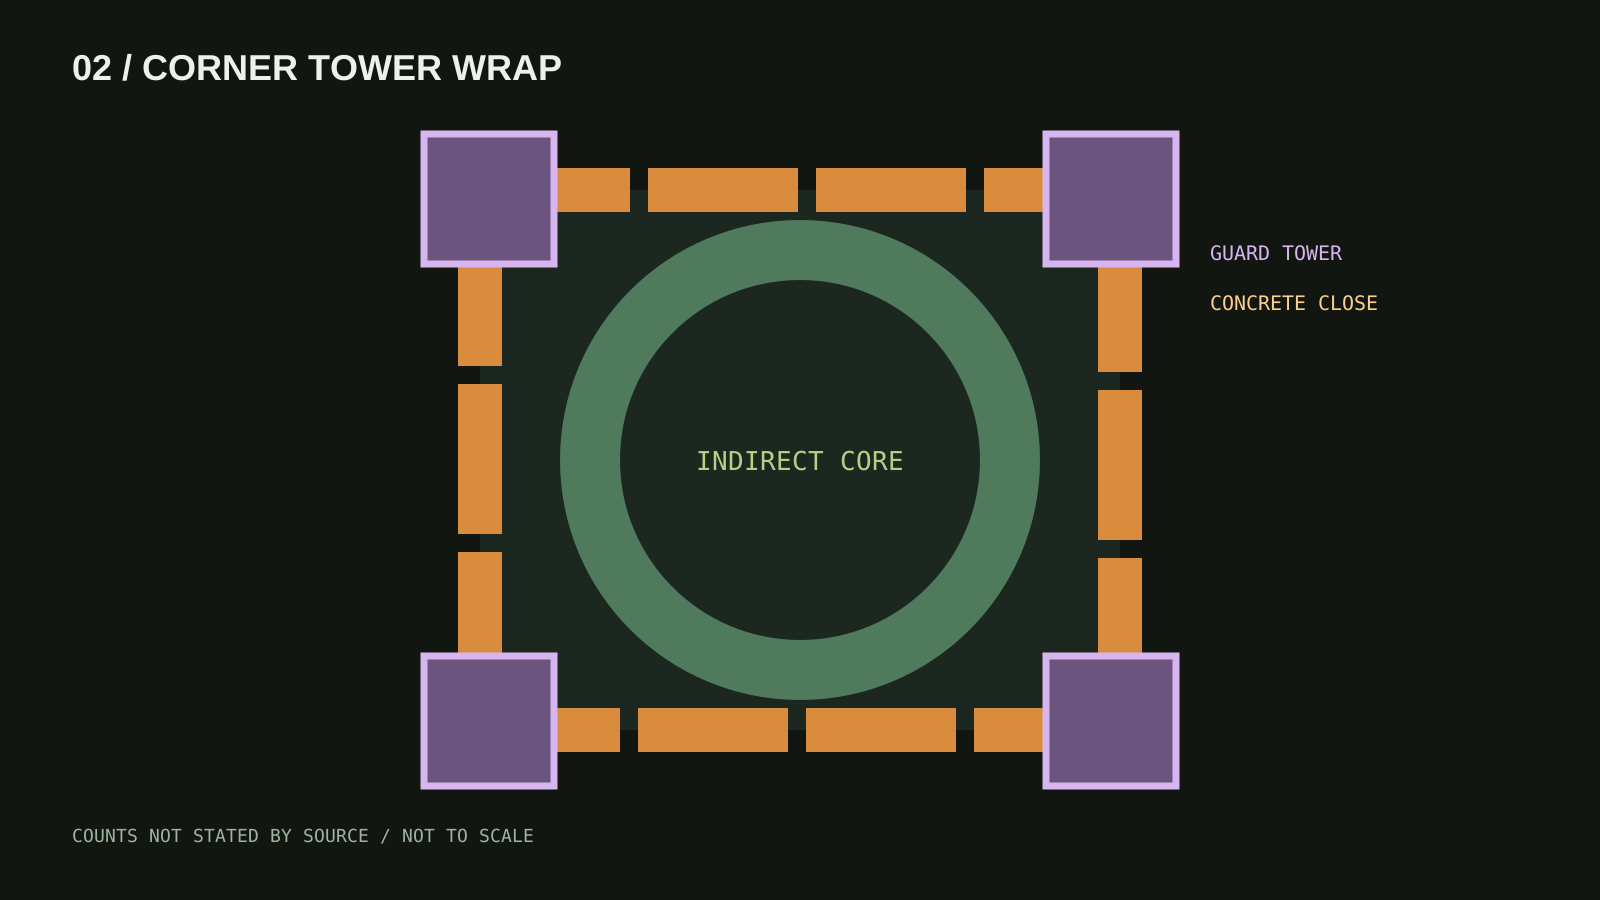
Now the part this column is really about. The islands become cells: small, hard units spread around the core, each cheap enough to lose and each covering its neighbours by fire, like compartments in a hull. Pick them from the library, in preview. The Layer Shield adds a second wall layer on the back and sides, tuned to a spot's blind angles. For anti-air, the Emplacement Mount is the gun itself, built from a distance so the marker holds still, and the Emplacement Talon swaps the mortar for a Talon so the same pit covers the sky. The Corner Tower Wrap uses Guard Towers and close concrete to close the open seams around a shelter, the Sniper Canopy turns a mortar pit into a covered position with a hesco corner and a sniper tower, and the Tower Stack Three stacks buildings three high to put a Talon on the roof. A gunship that strafes one cell has just told three others where he is. A mortar strike costs you a quarter of the base, not all of it, and rebuilding a cell is two minutes with a hammer. Use the ground: a strongpoint on the reverse slope and one on the high ground see what a flat square never will.
Layer Shield → Emplacement Mount → Emplacement Talon → Corner Tower Wrap → Sniper Canopy → Tower Stack Three →
Phase four: the perimeter comes last
Only now do you wall it in, and only because there's something inside that can hold the wall. The Stand-off Perimeter keeps vehicles away with a spaced hedgehog ring and puts barbed wire outside it, and the Brimmer Skirt is 23 brimmer walls around the FOB and tower, slanted out and flat in. Keep it light. It's there to slow and to channel, not to be the thing you fight for. A perimeter with no supply team and no cells behind it is an empty shell, and a chunky wall you can't cover by fire is just a queue for his C4. Krak got its outer walls last. So do we. That's still the point of the title: a castle without borders that grows borders only when it can afford them.
Air defence in layers, cheapest first
Against the chopper you want depth, not one big gun. First layer, the crate. A crate of AA launchers and soldiers spread across the islands so the aircraft is never engaged from one bearing. Two launchers from two angles will do what one launcher from the middle never will: make the pilot break off. Second layer, wheels. Vehicles with turrets are your mobile responsiveness. Fixed guns wait; a truck with a turret goes where the trouble is and comes back when it's over. Third layer, corners. A CIWS on the corners of your key islands is what turns a strafing run into a bad decision. And ultimately, the CIWS is the thing every other layer is buying time for. Fair warning: our build library doesn't yet have a sourced recipe for one, only that it needs the higher hammer tier. This is doctrine. When we've got the build on tape, it goes in the library.
When the shells start falling, hunt
Dispersal is the passive half. Here's the active half. Incoming artillery is a location broadcast. The tube has to sit still to fire. So the correct response to the first impact is not to hunker, it's to lift: your air goes and finds the mortar and kills it while the islands ride out the fire. Their air is your concentration's problem. Your air is their artillery's problem. Make it one.
Let them in
A square fights for its wall because it has nothing else. An amorphous base doesn't fight for ground, it bends. You let the enemy in. You fall back through the islands to the ground you can hold with the crew you've got, and every step they take toward you is a step into two other islands' arcs. Being supple is the point: there's no line to break because there is no line. Solo builder, no squad? Then rat-run and hide is the doctrine, and there's no shame in it. Know your ground, know your holes, and be somewhere else when they arrive. And be honest about the bigger truth: a defendable FOB needs a squad with comms. No squad, no comms, then don't die for it. Abandon it. Take it back later. This is where the amorphous base pays twice: a square that falls is gone, they hold it or they level it. Islands they don't want, and they walk away from; islands they do want, they garrison and fill your perimeter for you, and now you know exactly where they are. Either way you come back on your terms.
It's a money strategy too
Look at your end screen. Total profit is what's left after the walls you lost, the kit you got back and the damage you paid for. A square puts all your supplies into one perimeter, and when it goes, the whole bill comes due at once. Islands spend less up front, lose a quarter at a time, and give you the choice of not paying at all: walk away, let them garrison it, come back when it suits you, and if they've filled your perimeter for you, that's their money in your walls. The base that bends is the base that doesn't bleed cash every time a chopper turns up. Beaumaris ran out of money before it ran out of wall. Spend in order and you're never left holding an expensive, unfinished perimeter.
The rule that decides all of it
An island nobody stands on is a gift to the enemy. So the number of islands is the number of players you actually have, not the number the supplies allow. Four players, two islands. A full squad, four. Build for the team on the server tonight, not the team you wish you had.
To the square builders
No disrespect. A square is simpler to build with randoms, easier to explain in chat, and the supply maths of one perimeter versus four islands needs to be shown, not shouted. Lay them out side by side in the base builder on the site, read the supply bill and the covered arcs off the plan, and decide with numbers. If the square wins on your ground with your squad, build the square.
Why this is a Wing Mait column
A dispersed base only works if everyone knows where everything is, all the time. That's the job. "Chopper spotted, bearing zero three zero, six hundred metres" is the nervous system a decentralised base runs on. A spotted enemy mortar on your map is the marker that sends your air hunting. Islands, layers, hunting: it's all just knowing where things are, faster than the other side does.
Further reading
Everything above stands on other people's work, and it's worth your time. If you only read a few, read these.
KeenGamer, FOB layout and build order → G2A News, base building guide → WARDOGS Wiki, FOB guide → Krak des Chevaliers → Defence in depth →
Related field notes
 WARDOGS5 Oct 2026Stingray drone guideBuild the Stingray launcher, fly the drone without crashing it, wait for the red lock, and learn the APC's separate radar hitbox before you waste $5,000 finding out the hard way.FIELD NOTE 47
 WARDOGS28 Sep 2026Vehicle weak spotsWhere to aim on buggies, trucks, the L2A6 and the SPH-2 artillery tank, and what actually kills each one fastest.FIELD NOTE 48
 WARDOGS28 Sep 2026Flares and missile dodgesRead the two lock-on tones, hold the safe altitude band and pop your flares at the right second so the Talon and the Verba stop being a death sentence.
Sources
Numbers and mechanics on this page are paraphrased from:
- Ali Amir, KeenGamer, "WARDOGS Best Base Building Guide: FOB Layout & Build Order" (2026-09-22)
- Luke Kyle, G2A News, WARDOGS base building guide (2026-09-11)
- WARDOGS Wiki editorial team, "WARDOGS FOB Guide"
- Haider, GamesFuze (2026-09-12)
- wardogs.fit, "FOB Defense Layout"
- Shockbyte, "Rust Base Design Guide" (2026-05-01)
- Corrosion Hour, free 2x1 solo starter Rust base (2020)
- XGamingServer, Arma Reforger fortifications guide (2026-06-11)
- Foxhole wiki, Bunker Base
- Wikipedia, Krak des Chevaliers
- Wikipedia, Beaumaris Castle
- Wikipedia, Motte-and-bailey castle
- Wikipedia, Hedgehog defence
- Wikipedia, Defence in depth
- Wikipedia, Compartment (ship)
- Wikipedia, Forward operating base
Wing Mait is an independent project, not affiliated with or endorsed by WARDOGS or its publisher.