WARDOGS / FIELD NOTES
WARDOGS layered onion defense base: build it in layers from one cornerstone block
HitboTC's argument is that the right FOB is the one you can build quickly and in layers: Hesco walls and filled guard towers first, Bremers over them, then a final skin, all lined up from a single cornerstone block. He shows it on Bakarani at Tower 2, Mr. Rogers' Neighborhood and Tower 4. We call it the layered onion defense, set his prices beside our Season 2 menu readings, and show where he and our other guides disagree.
Quick card
- Layers
- Hesco walls first, Bremers over them, more Bremers on top
- Cornerstone
- one Hesco block on a good heading; every wall is built off it
- Tower 2
- his cornerstone heading is 120, south-east
- Guard towers
- fill the outside ones; keep the windows clear
- His prices
- Bremer 20, Hesco wall 46, large Hesco block 14
- Before 20 points
- a Stingray, tucked inside a Bremer box
Build in layers, not one big wall
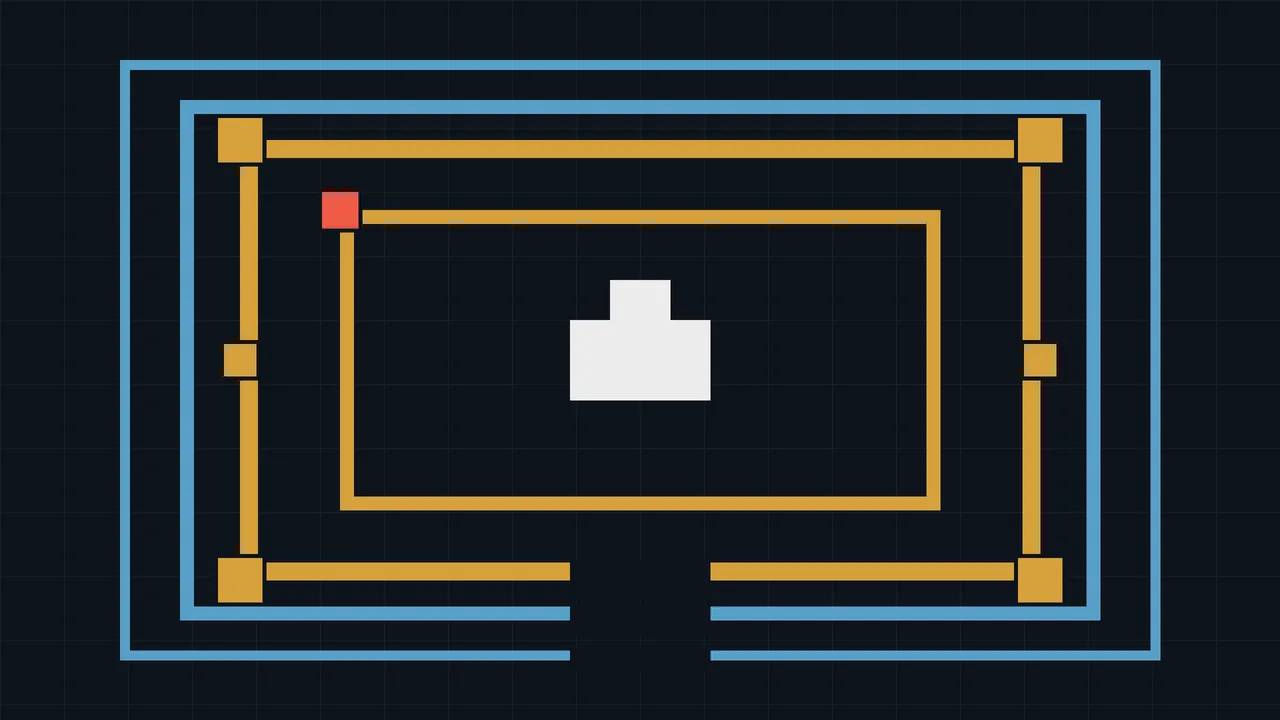
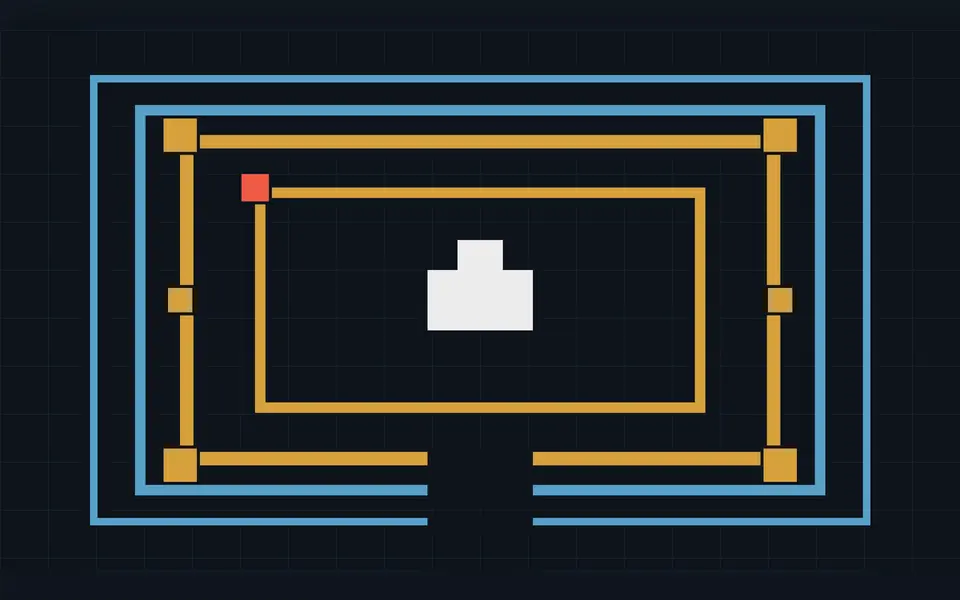
HitboTC says the question is not how to build the perfect FOB but how to build the correct one, quickly. He has built since the start of the game, has tested this method on his streams, and says it works on every map. He shows it on Bakarani, the firing range map. His central claim is that starting a base with Bremer walls is backwards. Start with Hesco and think in layers: the first layer goes tight to the main structure that protects your FOB, and the exterior walls come after that. We call the result a layered onion defense: an inner wall around what you protect, an outer wall around that, and each wall finished in passes, so the base is useful at every stage. The name is ours. His word is layers.
Start with Hesco: his prices and ours
His reason is cost and speed. On his screen a Bremer is 20, a Hesco wall is 46 and a large Hesco block is 14. A Hesco wall, he says, gets you a free Hesco block, so you can lay more walls faster and settle your layout sooner. Those are his figures. They do not match what we have read in the Season 2 menu, and we cannot tell why, so the table shows both. He also argues against building to maximum height from the start. Around a tower, maximum height leaves little dips where a wall will not snap, you end up placing blocks freehand, and the walls get messy. His view is that any wall is better than no wall, and you can raise it later.
| Part | HitboTC's video | Our Season 2 menu reading |
|---|---|---|
| Bremer wall | 20 | 27 |
| Hesco wall | 46 | 61 |
| Large Hesco block | 14 | 19 |
Keep the FOB alive first
At Tower 2 he places the FOB where nobody on top of the tower can reach it. Players jump onto towers from helicopters, and he says he has thrown C4 from the top trying to get it under a FOB. His warning: if the FOB is destroyed, the resources the logistics team has run drop to zero and the base is put on hold. The mortar pits and the CIWS (the game item; players say "C-Wiz") can only use what is already in them and cannot reload. When the FOB has to go in the open, he says to listen for anyone taking damage. He thinks a Little Bird needs about 12 rockets to destroy one, and that good pilots do it faster than you expect.
The cornerstone: one block sets every line
The cornerstone, which he also calls the corner block, is a single Hesco block placed on a heading that gives you a straight line. Every other wall is built off it. At Tower 2 he says a heading of 120, south-east, gives a perfectly straight line that lines up with the tower. His first attempt is slightly off, so he removes it and places it again. To check a heading, lay a couple of blocks and see whether they run into the wall. At a Mr. Rogers' Neighborhood corner he tries 260, sees it is off, and settles on 265, west. The order matters. He builds the inner wall first, tight to the tower. Then he places guide blocks off the cornerstone, builds the outer wall from them and deletes the guide blocks. The inner and outer walls then meet exactly, which pays off when you want to join them or add doors. The headings are his, for those spots. We have not checked them in game.
Layer one: Hesco walls and filled guard towers
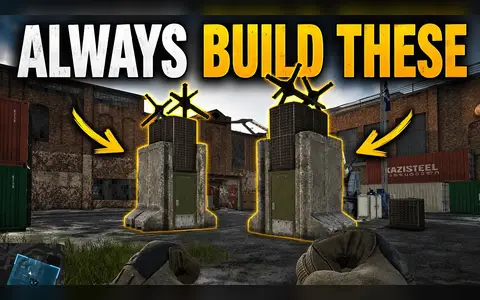
Layer one is Hesco walls with guard towers along them. He connects each wall to the back of a tower where he can, because guard towers give you a quick bastion. Every guard tower on the outside, he says, should be filled in, since enemies go straight into an empty one. One or two builders follow behind him and raise what he lays out, so the layout appears fast. He usually avoids gates, but for the first 0 to 20 points the APC needs a way in. So he builds a wider double gate between guard towers: tower, Hesco block, gate, gate, Hesco block, tower. A wider gate lets a guard see out and lets defenders open up and peek. A large shelter beside it makes a drive-through for logistics. Inside, he adds doors to the inner walls so one attacker who gets in cannot reach the whole base, and he places mortars off the base grid.
Layer two: Bremers, footer out, and the final skin
Layer two is Bremer walls on the outside of the Hesco. He puts the footer, the base of the Bremer, facing out, so there is no gap between the Hesco and the Bremer. With the footer in, he says, an attacker can jump up from it onto the Hesco and run along the wall. Next comes a Bremer on top, footer in, which gives a tall wall that is hard to breach. Last, he blocks the inside face of the Hesco with Bremers too, because he expects the base to be mortared heavily and this keeps the inner walls standing. His summary is that the wall does not need to be very tall, it needs to work. In front he sets hedgehogs a little way out so no car reaches the wall, and some barbed wire, which he never relies on because it is easy to destroy. He says he is not the first person to build this wall.
Guard towers: clear windows, then a kill funnel
Many builders ring a guard tower with Bremers. He says that keeps the tower alive longer, but you can no longer see out of the window, and a guard tower exists to shoot people running at your walls. He would rather keep the window sides clear. With a Bremer at the corner he loses part of the angle down the wall, and a dropped sandbag in the window gives a better peek. He says the netting makes defenders hard to see. Attackers see Hesco and think they have found the way in. By his numbers a double stack of Hesco takes four C4, and getting all the way through a guard tower takes about 8 to 12. His habit is to remove the ladder and the floor, fill the tower with Hesco blocks, leave a one-block step so defenders can jump in, and put the sandbags back. If C4 blows a Hesco, you can repair it while it is being hit or drop another. Then the funnel. He boxes the guard tower in with Bremers, so anyone who breaks through arrives at one gap, which is an easy kill funnel and easy to patch. Attackers look for the weakest point; he says the guard tower looks weak and is really a strong point. The captions do not make clear which sides of the tower carry the Bremers, so check the video around 27:30 before copying it. For calls, his group says only "breach" for a breach in the walls, then a direction, such as "breach northwest".
A CIWS beside a guard tower
He says he worked this out on stream the day he recorded. Place an Indirect Fire Shelter by a guard tower and turn the tower's ladder to face the shelter; this has to be done before the tower is built. He lifts the CIWS on a short stack of Hesco blocks, three or four high, or puts it straight on the shelter. The console faces the recon tower. Bremers protect the gunner, and the tower shields the gunner's body. He leaves one spot free of blocks so the gunner can hop out on top instead of getting stuck. From below, the tower gives cover from helicopters and mortars, and you get back to the CIWS quickly. The captions are hard to follow in this part. Treat it as a pointer, not a recipe, and watch the video.
Slopes and Mr. Rogers' Neighborhood: one step at a time
Mr. Rogers' Neighborhood is a Bakarani build spot that a member of his community named. He likes it when the circle allows it for blue, because it sits on the edge of the circle. By his account the only place other teams can easily reach it from is Tower 2, if green takes that, and red cannot really touch it from the red church or Tower 4. He starts at the back, a low point, from a cornerstone at 265, west. Climbing uphill, he adds a single step at a time. Steps raise the wall in small increments, and he avoids raising it too tall, because lower ground ahead then causes problems. Where it is too steep for a guard tower he accepts plain wall and calls it the weak point. The two directions end at different heights but still line up. Because walls on different terrain create jump-up spots, he says to keep them similar, even if lower, and to fill gaps with single Hesco blocks. His cost is people and logistics: at least three or four builders and a lot of supplies. He calls Tower 1 a tough build and Tower 2 a great one.
Tower 4, and a Stingray before 20 points
At Tower 4 he puts the FOB behind crates under a walkway, with the antenna close to the main structure, and places the cornerstone a little higher on a heading of 200, south. He builds the inner walls first, then the outer walls off guide blocks. The back of Tower 4 has a dip he calls brutal, so he sets the gates further back toward the base. He builds up against a building so players can jump into the guard towers from it, and puts as many guard towers as he can on the side attackers come from. Before a team reaches 20 points, he wants a Stingray. He picks a spot that is not in the open, drops Bremers, then the Stingray, then Bremers, and flips one Bremer at the back as a quick way in. He says this lets him fly the drone out safely and that he has destroyed many artillery tanks this way. His closing claim is that bases built like this withstood both teams from every angle for almost a whole match. That is his report, not our test.
Where this meets our other guides
This section is our view, not his. Tower walls. RadioGLHF says not to trust a tower's own walls and to build a full perimeter around the whole tower area. HitboTC builds on and against the tower, and relies on the tower to cover his FOB. The drill-first FOB guide ties drills into a tower and seals the whole tower. We have tested none of these, so we show all three. Hesco and Bremers. RadioGLHF notes that Hesco breaks down more than twice as fast as Bremers, which he accepts early. HitboTC starts with Hesco for speed and adds Bremers as later layers. They agree on the order. They disagree on prices: see the table above. The CIWS. The CIWS sunflower wraps it fully in Hesco and gates. RadioGLHF puts it on the garage roof. The drill-first guide puts it in the open behind hedgehogs with low walls. HitboTC puts it beside a guard tower behind Bremers. These are different answers to the same problem. Speed. Our APC city keep guide is a long build. HitboTC's layers are the opposite instinct, a base you can stop at after any layer. Like the drill-first guide, it worries about green scoring while blue builds. Where Wing Mait fits: the base builder prices a layout, and our Stingray guides cover the drone. We do not place walls for you.
Season 2 building dos and don'ts → APC city keep → Drill-first FOB →
Step by step
This is our write-up of the method in his video. We have not tested it. 1. Choose a FOB spot covered from above, as at Tower 2. 2. Place the FOB, then the cornerstone, a Hesco block, on your heading. His headings: 120 at Tower 2, 265 at the Mr. Rogers' Neighborhood corner, 200 at Tower 4. 3. Build the inner wall tight to the structure with Hesco walls and guard towers. Fill the guard towers. 4. Place guide blocks off the inner wall, build the outer wall from them, then delete the guide blocks. 5. For the first 0 to 20 points, build a wider double gate for the APC and add doors inside. 6. Layer two: Bremers on the outside of the Hesco, footer out. 7. Layer three: Bremers on top, footer in. 8. Block the inside face of the Hesco with Bremers. 9. Add hedgehogs well out front. Treat barbed wire as a deterrent only. 10. Before a team reaches 20 points, build a Stingray inside a Bremer box. 11. On slopes, raise walls one step at a time. 12. Call a breach by saying "breach" and a direction.
Sources and what we are unsure of
Everything here comes from HitboTC's video, published 5 November 2026, on the channel youtube.com/@HitboTC. We worked from the video's caption track, not frame by frame. The captions are automatic and carry word errors: they write brimmer for Bremer, esco for Hesco, and sea whiz or sea wizzes, which we read as the CIWS. The prices, the 120, 265 and 200 headings, the 4 and 8 to 12 C4 counts, the 12 Little Bird rockets and the claim that his bases held for almost a whole match are his measurements and reports, not our tests. He says guard tower, and once recon tower; we read these as the same piece, the Recon Tower, but have not confirmed it. Our Season 2 menu readings come from our other guides and a later patch may have moved them. If your game shows something different, tell us on Discord and we will fix it.
SOURCE BRIEFING
Source video from HitboTCEvery Great WARDOGS Base Starts HERE
Watch on YouTubePlaying loads YouTube. Choose captions in the player settings. Credit and thanks to the creator.
Related field notes
 WARDOGS4 Nov 2026Stingray tactics: a pilot's playbookOffset your launch, lock four seconds out, fly low, never hit the dish, and launch the moment a team hits 20. Goonz Gaming's Stingray tactics for hunting spawn vehicles.FIELD NOTE 04
 WARDOGS3 Nov 2026APC city: build a keep for your APCWhompin's three-floor APC keep: a shelter ringed by recon towers, an Indirect Fire Shelter stair, stacked bunkers and an exit that is never on the ground floor.FIELD NOTE 05
 WARDOGS3 Nov 2026Drill-first FOB: build fast, pull pointsTwo drills, a repair closet between them and one CIWS seat, built before green is halfway to 100. From Ryan an the world's video, priced at the Season 2 menu.
Sources
Numbers and mechanics on this page are paraphrased from:
Wing Mait is an independent project, not affiliated with or endorsed by WARDOGS or its publisher.