MW4 DMZ / FIELD NOTES
37 MW4 DMZ tips from StoneMountain64: grouped, time-stamped and checked against our other guides
StoneMountain64's 27-minute video lists 37 Modern Warfare 4 DMZ tips, from what to do right after the tutorial to the end game. Watch it first: his video is the source, embedded just below. This page is the organised companion. We sorted his tips into eight themes, kept the time stamp on every one so you can jump to it, and marked each as Confirmed, Untested or Conflicts against the other creators and our own guides. We also compare his list with IceManIsaac's 30+ tips. Nothing here is our own testing.


Quick card
- Source
- StoneMountain64's 27-minute video: 37 numbered tips, a bonus and one unnumbered extra, each with its time stamp
- Quick wins
- Prioritize Interact on, a Medium Backpack at DMZ level 2, a UAV tower before any big compound, a medkit for every teammate
- Where sources differ
- Five tips are marked Conflicts: free loadouts, what a teammate revive does, Colossus and explosives, Die Hard, and bounty intel
- On the map
- Existing Hajin map links only: UAV towers, exfils, Lieutenant towers, SAM sites, bounty stations, the casino and the reactor
- Status
- His claims on the early-access build, paraphrased from his captions, not re-tested by us
Watch his video first
StoneMountain64 made this list, and his video is the primary source: the demonstrations, the menus and the context are all in his 27 minutes. Please watch it, and subscribe to his channel if it helps you. This page is the companion. It holds his 37 numbered tips, his bonus tip and one extra he mentions without a number, grouped into eight themes, and every tip has its time stamp so you can jump straight to it. Every tip is his claim, in our words, and we have not played any of it. The Status column says how it stands against the other creators and guides on this site. Confirmed means another source we cover says the same. Untested means he is the only source we have. Conflicts means a source we cover says something different about at least part of the tip, and the Cross-check column shows both. The Time column opens his video at that moment.
No tip matches that search.
Watch StoneMountain64's full video → StoneMountain64's channel on YouTube →
Settings and reading the screen (tips 9 and 28)
Two small things that cost nothing. The settings are preference, so try them and keep what suits you. The icon tip is about not selling something your FOB upgrades need.
| Tip | Time | What StoneMountain64 says | Status | Cross-check |
|---|---|---|---|---|
| 9. Settings | 6:39 | Three settings to change before your next raid. Turn on Prioritize Interact, so looting, doors and body bags happen on a tap instead of a hold, and a tap still reloads when there is nothing to interact with. Set Focus Behavior to Auto, so aiming down sights steadies your aim without holding your breath. Turn off Tap Sprint Cancels Reload. He says snipers may prefer the manual breath hold. | Untested | A matter of preference, so there is nothing to confirm. We have not tried these toggles. |
| 28. Item Icons | 20:45 | Every item has an icon. A diamond is a valuable you can sell, a small square is a printer part and a book is a recipe. Some valuables are tempting to sell but feed FOB upgrades, mostly the bank: infantry invasion plans, logs, the basic green ones and several purple ones such as the WMD plans. | Confirmed | IceManIsaac (tip 6) also warns that a cash or diamond icon is not always sell-only and keeps documents for upgrades. |
Loadout and weapons (tips 2, 3, 11, 12, 13, 26, 29, 32, 33 and the bonus)
Free kits, backpacks, ammo and guns. His headline advice: spend on the FOB before the Gunsmith, level guns that share attachments, and use a free blueprint build on a raid you can afford to lose. The insurance row is not in his chapter list; he mentions it in passing at 18:43.
| Tip | Time | What StoneMountain64 says | Status | Cross-check |
|---|---|---|---|---|
| 2. Free Loadout | 1:09 | While you learn, turn on the free loadout on the Ready Up screen. It costs nothing and you queue straight in, and if you extract with it you keep everything you bring out. The catch is that it has no secure slot, so anything you do not get out with is gone, however good it was. He says you will lose a lot of kits early on, and everybody does. | Conflicts | He does not say what dying costs your operator. IceManIsaac (tip 14) paid about $100,000 to recover an operator after dying on a free loadout, and our regain guide carries the same caution. Free means free gear. |
| 3. Medium Backpack | 1:28 | The 3D printer opens at DMZ level 2, and a Medium Backpack is one of the first things to print: 50 synthetics and 5 rigid synthetics for much more room. The bag you start with has no secure slot. You also get medium bags from kits and rewards. You can track only a few recipes at a time, so untick the ones you no longer want from the top of the printer. | Confirmed | Our level unlocks guide lists the 3D printer and the Medium Backpack recipe at level 2. Our 3D printer recipes guide has no cost for the bag yet, so the 50 and 5 figures are his alone. |
| Bonus. Free Vault Guns | 4:13 | If you pre-ordered the Vault Edition, or even played the beta, he says you may have free guns waiting. Look at the signature weapon blueprints at the Gunsmith for a fully built gun at no cost. The first build is free, and buying it again is quite expensive. He hedges with the word apparently. | Confirmed | IceManIsaac (tips 10 and 11) and our blueprint redemption guide describe the same free first build, and tell you to read the cart before you confirm. |
| 11. Gun XP | 8:55 | Gun XP does not only come from kills. Looting and doing ops level whatever is in your hands, and he even got levels from exploring and from running over AI with his car. He levelled his knife by mistake during an op. Weapon levels, attachments and camos carry over to multiplayer, and DMZ XP counts toward your player level. | Untested | Single source for the passive XP. IceManIsaac (tip 12) also says DMZ levels carry over to multiplayer and Warzone. |
| 12. Ammo Boxes | 9:34 | Ammo is hard to come by. It takes no bag space now, but kills give little and it runs out faster than you think, so always bring an ammo box. They are cheap to print and keep a whole squad topped up in a long fight, such as a Commander. If you are short, the ammo and armor caches inside compounds show on the map when you zoom in, and one box gives both. He says running out of ammo and plates caused almost all of his deaths. | Untested | IceManIsaac (tip 29) also tells you to use the armor and ammo caches, and says they refill every 60 seconds. The advice to print ammo boxes is StoneMountain64's alone. |
| 13. Han 86 Drum | 10:31 | The Han 86 is one of the most common guns the AI drop, so it levels quickly and is good enough for the early game with a suppressor and the 60-round drum, both early unlocks. You never have to buy it. | Untested | Nobody else we cover rates this gun. Our 3D printer farming guide only mentions an Ultra Han 86 that Eakr opens from a Basic Weapons Locker in Deadtown. |
| 26. Shared Attachments | 19:41 | Once you unlock an attachment it works on every gun that can take it, and if a gun's next level would only give you an attachment you already own, it skips straight past that level. He suggests levelling guns that share attachments to climb faster. The caption is garbled on the last part of that sentence. | Confirmed | IceManIsaac (tip 12) says attachments are shared inside a weapon class, and the weapon shop carries a Shared Attachment tag. The level skipping is his alone. |
| 29. Throwables | 21:15 | When you print a lethal or tactical, such as throwing knives or smokes, do not print two. Print one straight to your operator and it goes up to two once you are in the raid. With the restock perk it keeps making more, and it restocks whatever was most recent even when the icon is gone. | Confirmed | IceManIsaac (tip 3) says the same: print one and the game fills the rest on entry. |
| 32. Red Attachments | 22:47 | Attachments on a weapon taken from an AI or a player show a colour. A red one is broken, and you pay the Gunsmith to remove it before you fit your own. If the whole weapon is red it is Ultra rarity with six or more attachments, so weapon colour follows the attachment count. A normal valid attachment has a small orange marker. | Untested | Not covered by our other guides yet. |
| 33. Free Blueprints | 23:10 | A free blueprint build only works once. His free M4 came out of the Gunsmith fully built for nothing, then cost 88K to build again, so use it on a raid you can afford to lose it in. Purple and orange guns already have four or five attachment slots, so rebuilding them is cheaper. Each slot you add costs more and you can buy up to five. He says boss guns cannot be changed, but red and gold guns from weapon lockers can. | Confirmed | IceManIsaac (tips 10 and 11): the first build is free and each slot costs more, with a fifth at $50,000 in his cart. The 88K figure is his M4 only. |
| Extra. Insurance | 18:43 | Not in his chapter list. Next to the Edit Loadout button a small crosshair icon insures your weapons, so if you die holding the gun it comes straight back without an exfil, though you lose what you found. You can insure your operator too, but you have very few insurances, and he would only use one on a max level operator, where the MIA cost is highest. | Confirmed | IceManIsaac (tip 17) describes the same limited insurance slots for operator and loadout. |
3D printer recipes: all 14 → Claim your first blueprint copy → Regain: free kit to extraction →
Operators, traits and staying alive (tips 4, 17, 19 and 25)
Two traits and two consumables. Possum is the trait he buys first, and it is also the reason he says to strip a body before you loot it. The medkit tip and the Die Hard tip are where his advice and other sources part ways, so read the Cross-check column.
| Tip | Time | What StoneMountain64 says | Status | Cross-check |
|---|---|---|---|---|
| 4. Traits | 2:11 | Each operator has its own traits and levels from Steel to Onyx III, enough for two roles or a hybrid, and a pick cannot be undone. The question mark traits are random per operator and re-roll when you prestige. In Scout he takes Hostile Looter, and Combat Scavenger if it shows up, so the AI sometimes drop printer parts and valuables, and further up the UAV Upgrade and the unlimited UAV tower duration. Possum, at the end of what he calls the red tree (we read it as Warfighter), lets you get up from dead once per raid. He expects it to be changed and says it is usually the first perk he buys. | Confirmed | McBread's video, which our traits guide covers, agrees on Possum, the question mark traits, Hostile Looter and Combat Scavenger. IceManIsaac (tip 13) names Possum and UAV Upgrade as strong prestige rolls. |
| 17. Medkits | 12:26 | When you go down you get one free self-revive through a tourniquet, but you come back with less max health. A bandage covers that for a few minutes and a stim for a little while, and if you go down again on a bandage alone you are dead for good. A medkit clears the penalty entirely, so you can be downed and tourniquet up again. They are rare, so check clinics, bathrooms and medical cabinets, and carry one for each teammate. He runs medkits only. He also says a teammate revive after a full death leaves you at about 30 health. | Conflicts | The medkit advice matches our dev Q and A guide and IceManIsaac (tips 27 and 28). One detail differs: IceManIsaac says a teammate's revive does not leave you wounded. |
| 19. Sedative Inhaler | 14:35 | A sedative inhaler makes you immune to radar marking and thermals for about a minute, and they stack. The recipe unlocks at DMZ level 3 and is cheap to print, and you find them all over. Use one when a UAV goes up near you or you need to cross a UAV circle. If you are low on space, use it straight from the loot card without putting it in your bag. | Confirmed | Our level unlocks guide lists the Sedative Inhaler at level 3, and IceManIsaac (tip 19) also uses consumables straight from the loot card. The one-minute length and stacking are his alone. |
| 25. Die Hard | 19:11 | For solo play, Die Hard is a Survivalist trait that gives unlimited bleed-out time, so you can crawl to the exfil while down and call the helicopter automatically. He would only take it if you are struggling, play solo a lot and want to avoid PvP. You do not crawl fast. | Conflicts | The trait text matches the trailer text in our FOB and progression guide. McBread says it is not worth nine points on its own, because whoever downed you will usually finish you. |
Looting and other players (tips 7, 8, 14 and 21)
How he treats a body and a stranger. The Possum trait is the reason the first tip exists, and the proximity chat tip is the opposite of the Squad Fill off advice some creators give for solo play.
| Tip | Time | What StoneMountain64 says | Status | Cross-check |
|---|---|---|---|---|
| 7. Strip Their Armor | 5:24 | Because of Possum, a player can get back up once per raid even after you finished them. It is not instant: it takes a few seconds, and then they need a tourniquet. So do not go straight into the bag. Reload, heal and check windows and roofs for their teammates, put a bouncing betty or claymore on the body if you have one, and if you have time take their armor and their bag so they are easy to kill if they pop up. He says some pop up at once, and others wait five to ten minutes to catch an exfil and avoid the MIA cost. | Confirmed | IceManIsaac (tip 1) gives the same warning and the same counters, and McBread (our traits guide) says to take plates and the self-revive from a body. |
| 8. Resources Tab | 6:22 | When you loot a player, their bag has a resources tab in the top right with the resources they were carrying, and you can take all of it. He did not know you could loot it until his second day. Also grab their raw cash. | Untested | Single source. IceManIsaac (tips 24 and 25) says scrapped materials go into resource slots and that you should loot the operator as well as the backpack, which fits but is not the same claim. |
| 14. Car Trunk | 10:48 | You can throw items into a car's trunk when your bag is full, and he says the best use is to mule something over to a teammate. | Untested | Not covered by our other guides. |
| 21. Communication | 15:51 | Not every player wants to fight you, and proximity chat is directional now. When a stranger shot at him in solos he talked them into squading up, and his first real exfil was with them. Hold the ping button to ask to join a nearby squad or invite one. Once you are in a squad together he says you cannot betray each other: no friendly fire, you cannot leave, and you see them bottom left like a normal squadmate. | Untested | A different approach from IceManIsaac (tip 16), who queues as one and turns Squad Fill off. The no-betrayal rule is his alone; in the MrBeast match we broke down, truces were called, broken and called again. |
Keys, doors and secure slots (tips 15, 22 and 30)
Locked doors, what to hold in a secure slot and where to park overflow. He names no key spawn, so we have added nothing to the keys layer. The links under the table open the keys already on the map and the one fixed place he names, the nuclear facility, which we take to be the Haneul Nuclear Reactor. He does not say which place he means by the military complex, so we have not pinned it.
| Tip | Time | What StoneMountain64 says | Status | Cross-check |
|---|---|---|---|---|
| 15. Locked Doors | 10:58 | A lot of locked areas open another way. A door with no power usually has a generator in a nearby basement or garage. Some buildings have a security room where you cycle the cameras to open the gates. Some keys spawn on tables near the doors they open. In the military complex one access key opens many doors, and the notes give the code for the armory below. Campaign mission areas stay accessible outside the missions. A compound such as the nuclear facility can be entered over the roof and unlocked from the inside. | Untested | Our secret loot rooms guide covers key rooms that other creators filmed. The generator, camera and roof routes are his alone. |
| 22. Secure Your Manuals | 16:30 | Looting something offers a Secure option, but you hold the button for it. It then drops into your backpack, and if you secure into a full slot the old item drops back into your bag. He lost a key by not securing it. A medium bag has one secure slot, a large bag (printed later) has two, a red bag has four, and small secure bags have three. Secure weapons, manuals and recipes. A gun only unlocks at the Gunsmith from its manual, and bringing the gun out no longer unlocks it. Each manual or recipe pays 5,000 on extraction, even a repeat. | Confirmed | IceManIsaac (tips 15 and 21) agrees on secure slots, keys and manuals, and thinks some bags have up to four. GNGWarzone, in one of our other guides, also says each extracted recipe pays 5,000, a figure we could not see on a card. |
| 30. Extra Storage | 21:35 | Your stash starts small, he says 40 items and 12 weapons, and it fills fast. Start a second, third or fourth operator, put a bag on them and use that bag as overflow. He first stored keys there, then preferred to keep printing materials there so he can still see his keys. You can see every operator's bag from the tab, or by highlighting the operator on a controller. | Confirmed | IceManIsaac (tip 2) runs a second operator as a mule the same way. The 40 and 12 starting sizes are his alone. |
Haneul Nuclear Reactor on the Hajin map → Keys on the Hajin map → secret loot rooms, 5 hidden on Hajin →
Economy, orders and progression (tips 1, 5, 6, 16 and 31)
Money, orders and where to start. Most of these are about not wasting early cash. The casino and bounty tips name fixed features of the map, so the links below the table open them.
| Tip | Time | What StoneMountain64 says | Status | Cross-check |
|---|---|---|---|---|
| 1. Orders and Dynamic Ops | 0:28 | After the tutorial, work your orders, which are the game's to-do list and where early unlocks come from, and do the story missions. Do at least one dynamic op every raid: each pays a guaranteed 10 to 20k and a lot of XP, and you get a supply drop for every op you complete, which get better. You can pull up the map to cancel an op that is out of your way. | Confirmed | Our infil planning guide says Dynamic Operations deposit $10,000 to $20,000 on completion. The supply drops improving is his alone. |
| 5. FOB Before Guns | 3:32 | Put your first money into the FOB, not your guns. A built gun gets expensive quickly and you could lose it in the next raid, while the AI drop guns good enough to start with. Many players go bank first, then stash, because the bank has a cap and cash over it is wasted. Walk in rather than pay 50k for a helicopter. Once those are done, add one attachment for a suppressor, an early unlock on almost every gun, after the Gunsmith opens at level 10. | Confirmed | Our infil planning guide lists the Helicopter infil at $50,000, our level unlocks guide opens the Gunsmith at level 10, and IceManIsaac (tip 7) also warns that the bank has a cap. |
| 6. Pick Your Spawn | 4:34 | When you deploy you pick a story mission, dynamic operations or free roam. It is the same map and the same players, and the difference is where it drops you. Dynamic ops tend to start you out on the edges. A story mission starts you right next to its objective, and you can replay chapters from the list. If there is an area you want to loot, or a key you want to use, pick the mission that lands you near it. He calls that a free version of the cargo plane infil that would cost $100,000. | Confirmed | Our infil planning guide lists a fifth infil option at $100,000 with a fixed-wing icon and no name, which fits his cargo plane, though the name is his reading. |
| 16. Casino Heist | 11:47 | Let another squad do the casino heist. You can start the generator and open the vault outside the mission, but there are 12 bags of 1,500 to carry one at a time to a truck you must fuel, for about 18k, which he did not think was worth it. If another team is mid-heist, kill them and take the loose cash, pick the middle area lock and loop the outer room for the rest. | Untested | Nobody else we cover tests the heist. 12 bags at 1,500 is 18,000, so his own sums agree. |
| 31. Bounties | 22:05 | Killing other operators builds a bounty on your dog tag, and four kills makes you wanted. At a bounty station you can buy intel on a wanted player and get a circle around their area that shrinks faster the more wanted they are. To get paid, extract with their tag. A big bounty on you gets you hunted, and you can pay to reduce it. He extracted a tag with a 100K bounty and did not seem to get anything, and every tag looked like Steel, so he suspects a bug. | Conflicts | Our casual mode guide agrees on four kills and the bounty station, but says the intel pinpoints the target on the tac map and that your cut lands in your Bank after you exfil. |
Cheongun Village and the casino on the Hajin map → Bounty stations on the Hajin map → Infil planning →
Extraction and map awareness (tips 10, 20, 23 and 24)
Reading the map before you move and getting out in one piece. His rule is to treat every exfil as camped, and to pop a UAV tower before you commit. The link below the table opens the UAV tower and exfil layers on the Hajin map.
| Tip | Time | What StoneMountain64 says | Status | Cross-check |
|---|---|---|---|---|
| 10. UAV Towers | 7:26 | UAV towers send out a pulse that shows the players and AI near you, and they are free this time. Find one before a big compound so you know whether a squad is waiting. You no longer have to stand locked to the terminal: you can move and turn around while you capture it. It works both ways. If you are inside another squad's UAV circle they can see you as a red circle on their map, so get to the edge and out; even with Ghost, an advanced UAV perk still shows them where you are, though not which way you face. A lit tower means an enemy squad is close, and one lit for a long time suggests the perk that keeps it on. The AI do not fight each other, so gunfire that is not you or your squad is another player. | Confirmed | McBread (our traits guide) passes on the same worry about active towers and describes the perk that keeps one on, and Eakr (in our 3D printer farming guide) takes the nearest tower first. |
| 20. Parachutes | 15:14 | Most parachutes are not infinite any more. Only the legendary tier is. You can find one, buy one from a vendor, or craft one in a raid once you have the ability. Fire stations are a good place to look, and towers sometimes have them. Keep any extra so you can give it to another operator or go back in with another. | Confirmed | Our dev Q and A guide says the base parachute is limited-use, that you find them in places like fire stations, and that infinite-use ones exist. Our level unlocks guide lists a Parachute (Legendary Consumable) at level 69. |
| 23. Camped Exfils | 17:24 | You have to hold the exfil until the helicopter lands, so it is the easiest place on the map to be ambushed, and squads sit there waiting for full bags. A green flare goes up when someone calls one, and there are only so many exfils. Pop a UAV tower near you first; he has seen quiet exfils turn into three players. Once you board the helicopter the timer drops, and in a trio your whole squad needs to be on it. | Confirmed | IceManIsaac (tip 32) gives the same timer behaviour, and our exfil guide calls exfil sites ambush points marked by green smoke. |
| 24. Fultons | 18:07 | A Fulton balloon lets you exfil wherever and whenever you want. It is a red item and very rare, and he buys one whenever the vendor has it. Some dynamic ops give a free exfil at the end, and most campaign missions have a special exfil if you finish them, but as more players finish them the open map will fill up. Keep a Fulton in a secure slot for a camped exfil. | Untested | Our exfil guide lists the Fulton balloon as an alternative to the Twin Heli and the flare, with unknowns marked. The red rarity and the vendor are his alone. |
AI enemies and bosses (tips 18, 27, 34, 35, 36 and 37)
Commanders, Lieutenants, a tougher helicopter and anti-air. The Colossus and Lieutenant tips overlap our bosses and farming guides, and where they differ we show both. The links below open the Lieutenant tower, SAM site and Commander layers, and The Grid, which he names for the Deathstalker.
| Tip | Time | What StoneMountain64 says | Status | Cross-check |
|---|---|---|---|---|
| 18. Colossus | 13:25 | Colossus is one of the Commanders: a seven-foot soldier with a minigun who shrugs off normal weapons and, he says, is completely immune to explosive damage. Commanders get marked on your map when you are close, and you cannot buy intel on them. He eats ammo, so carry two or even three weapon types. Fight from cover next to an ammo resupply box, head glitch him and keep your distance, and with a teammate call out which way he is looking and swap who shoots. The first one you kill pays some DMZ cash and drops a golden blanket that he says you need, five at least, to print epic rarity ingredients. | Conflicts | Our farming guide records that some sites say he resists explosives and others dispute it, and says not to plan around it. It agrees there is no intel to buy and that Commanders show on the map. It lists $50,000 for each first Commander kill and Military Composites as his drop, and we cannot match the golden blanket to an item name. |
| 27. XP Farm | 19:58 | Find an ammo cache in a high threat area, get inside and hold it. Keep killing AI as the threat climbs, stay inside so they cannot all see you, and top up from the cache, which you can use every minute. The XP falls the longer you hold. Watch the hostile meter: a full one sends a hunt squad, which is strong enough that he thinks it may be changed. Some players queue campaign missions to land in a hot area and grind quickly. | Untested | IceManIsaac (tip 29) backs the 60-second cache refill, and IceManIsaac (tip 26) mentions search parties at a high wanted level. The farm and its falling XP are his alone. |
| 34. Lieutenant Towers | 24:02 | Climb a Lieutenant tower instead of buying the intel. He paid 25K for intel on one for a bounty that pays only 10K, then died and wasted more. Climbing a tower marks one for free. Bring your best armor and, if you are solo, a medkit, because they hit hard. Only grab the dog tag case if your exfil is close. | Confirmed | Our bosses guide says a Lieutenant Hunt tower gives you the general location, and our solo boss run guide has a creator paying 25,000 for boss intel. |
| 35. Dog Tag Case | 24:26 | A killed Lieutenant drops a dog tag case worth 25 grand cash. It takes a bag slot, and only whoever extracts it is paid. While you hold it, your position is revealed to the whole map, with pings every 5 seconds, and his squad uses that to find players to kill. If you are solo or not ready for a fight, leave it, or drop it as bait if you are being followed. Bosses also drop keys to their own special rooms and strong weapons. | Confirmed | Our bosses guide says the case shows on the tac map for every operator and that picking it up broadcasts your position. The 25 grand value and the 5-second ping are his alone. |
| 36. Marked Helicopter | 25:24 | There is a special marked helicopter, a lot tougher than the normal one, and the first time you take it down it pays 50K. The Boss Board shows the reward for everything. Use ammo resupply boxes, or better a SAM site. | Untested | Not covered by our other guides. Our farming guide has $50,000 first-kill rewards for the Commanders, which is a different target. |
| 37. SAM Sites | 25:53 | Taking control of a SAM site shoots down enemy aerial vehicles, and you can place a portable one if you get the blueprint or find one. Use one on anything in the air. The Deathstalker is another Commander, a huge drone with two machine guns, found especially in The Grid, and a SAM site brings it down, but it also shoots down enemy helicopters, including players'. If you are flying, stay low, especially without a parachute. | Confirmed | Our farming guide lists The Grid as a reported Deathstalker area and the SAM site as the method most people use, and IceManIsaac (tip 31) warns pilots about enemy SAM sites. |
Lieutenant towers, SAM sites and Commander areas on the Hajin map → The Grid on the Hajin map → Bosses: Lieutenants and Commanders →
Where StoneMountain64 and IceManIsaac agree and disagree
The two lists came out on the same day, so it is worth seeing where they line up. Our IceManIsaac guide has his full 30+ tips, and this table points at the ones that overlap. Most of it agrees. The real differences are the free loadout and what a teammate revive does.
| Topic | StoneMountain64 | IceManIsaac | Read |
|---|---|---|---|
| Possum bodies | Strip the armor and bag, put a mine on the body and check for teammates first (tip 7). | Expect it, put a claymore or trip wire on a body you suspect, and strip the body (tip 1). | Agree |
| Free loadout | Free gear with no secure slot, and a good way to learn (tip 2). | It still deploys your own operator, and he paid about $100,000 to recover his (tip 14). | Differ |
| Secure slots | Medium bag one, large two, red four, small secure bag three (tip 22). | Most bags have one or two and he thinks some have four (tip 15). | Agree |
| Shared attachments | Unlocked once, it works on every gun that can take it (tip 26). | Shared inside a weapon class (tip 12). | Mostly agree |
| Free blueprint builds | Once only, and his M4 cost 88K to rebuild (tip 33). | The first build is free, read the cart, and a fifth slot is $50,000 (tips 10 and 11). | Agree |
| Throwables | Print one and deploy with two (tip 29). | Equipped plates, ammo, tacticals and lethals top up on entry (tip 3). | Agree |
| Mule operators | A second operator's bag as overflow (tip 30). | One operator as a mule for keys and rare loot (tip 2). | Agree |
| Medkits | A medkit clears the penalty, and a teammate revive leaves about 30 health (tip 17). | A medkit clears it, and a teammate's revive does not leave you wounded (tip 27). | Differ on the revive |
| Ammo and armor caches | Resupply there, and farm XP from inside one (tips 12 and 27). | They refill every 60 seconds, so make laps (tip 29). | Agree |
| Exfil timers | Board the helicopter to drop the timer, and a trio needs everyone on (tip 23). | A solo player gets 5 seconds, and a trio starts at about 30 to 45 seconds until everyone is in (tip 32). | Agree |
| Insurance | A crosshair icon insures weapons, and the operator only at max level (extra at 18:43). | Three slots each for operator and loadout, used on entry (tip 17). | Agree |
| SAM sites | Capture one or place a portable one, and pilots fly low (tip 37). | Avoid enemy SAM sites when you fly, and pop flares at once (tip 31). | Different angle, no conflict |
| Playing solo | Talk to strangers and squad up, or take Die Hard (tips 21 and 25). | Queue as one person and turn Squad Fill off (tip 16). | Different angle, no conflict |
What we checked, and where Wing Mait fits
We have not played any of this and we have not watched his footage. This page follows StoneMountain64's auto-generated English captions and his chapter list, and the status column comes from setting his words beside our other guides. His numbers, 10 to 20k for a dynamic op, 25K for intel, 88K for a rebuild, 12 bags of 1,500, 5,000 for a manual and a ping every 5 seconds, are early-access figures that a patch can change. He says himself that Possum, the ammo cache farm and the hunt squad may be changed. What we have not confirmed: the golden blanket and how it maps to the Commander ingredients on our farming page, the supply drops improving, the red attachment colours, the resources tab, the car trunk, the squad no-betrayal rule and whether a Fulton shows up at every vendor. We left the keys layer alone because he names no key spawn, and we did not add a route because none of his tips is a run. Much of this is on-screen text: the Ready Up screen, the printer, the secure prompts, the threat meter and the exfil timer. Reading that text is what Wing Mait does, so a callout can speak up while your eyes stay in the fight. DMZ support is in development, and Wing Mait doesn't read game memory, inject anything or send inputs to the game.
Source briefing
Tips and quotes: StoneMountain64, "THE ULTIMATE Guide For DMZ in MODERN WARFARE 4..." (YouTube, 23 October 2026), 26 minutes 52 seconds, with his chapter list. The wording is ours, paraphrased from his auto-generated captions, which mishear a few words (they write Haidyn for Hajin and Xfil for exfil), and we read those in context. The other creators we compare are IceManIsaac for his 30+ tips and McBread for the traits; the rest of the cross-checks are our own guides, linked in each section. Please watch his full video for the demonstrations. Thank you to StoneMountain64 for putting this list together.
Watch StoneMountain64's full video → StoneMountain64's channel on YouTube → MW4 DMZ tips: 30+ things the game never says →
SOURCE BRIEFING
Source video from StoneMountain64THE ULTIMATE Guide For DMZ in MODERN WARFARE 4...
Watch on YouTubePlaying loads YouTube. Choose captions in the player settings. Credit and thanks to the creator.
Related field notes
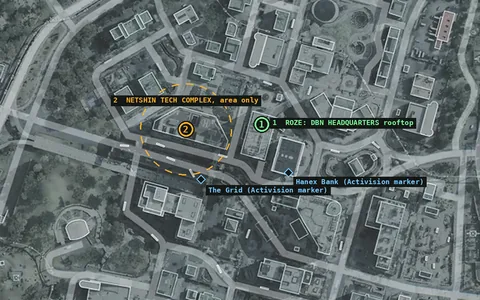 MW4 DMZ25 Oct 2026Roze's key armory, tested 5 timesShirasu's five-run test of Roze's key on Hajin: the Nenshin Tech Complex armory in The Grid, a gold THE KRAKEN each run, one red-weapon run and one weapon manual.FIELD NOTE 19
 MW4 DMZ25 Oct 2026MW4 DMZ traits: every trait, what to take firstThe MW4 DMZ trait system explained from McBread's video: all three trees, every trait, Possum, MIA costs, Prestige and the best picks for solo, squad and loot.FIELD NOTE 20
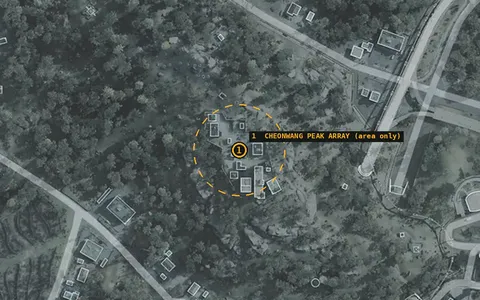 MW4 DMZ25 Oct 2026Solo boss run: Iskra at Peak ArrayHow to kill the MW4 DMZ boss Iskra solo at Cheonwang Peak Array, from kojiro51's 10-minute run: intel, route, fourth-floor fight, key room and exfil.
Sources
Numbers and mechanics on this page are paraphrased from:
Wing Mait is an independent project, not affiliated with or endorsed by Activision. Wing Mait for MW4 DMZ is in development and has not been released.