MW4 DMZ / FIELD NOTES
MW4 DMZ tips: 30+ things the game never tells you, from IceManIsaac's Academy video
IceManIsaac's 24-minute video lists 30+ Modern Warfare 4 DMZ mechanics the game never explains, and a few of them can save a run or cost you a very expensive operator. Watch it first: his video is the source, embedded just below. This page is the organised companion to it. We sorted his tips into eight groups, kept each one short, and linked the ones that touch our Hajin map, the 3D printer recipes and the other guides on this site. Where something comes from his own testing, we say so.


Quick card
- Source
- IceManIsaac's DMZ Academy video, 32 numbered tips
- Biggest trap
- A free loadout still deploys your own operator, and he paid about $100,000 to recover his
- Biggest saver
- Equipped plates, ammo, tacticals and lethals top up when you enter a raid
- Hidden controls
- Merge Stacks, track an upgrade, use a consumable without looting it, Squad Fill off for solo
- Status
- Early-access build; his testing, our paraphrase, not re-tested by us
Watch his video first
IceManIsaac made this list, and his video is the primary source: the demonstrations, the menus and the context are all in his 24 minutes. Use this page as the companion to it. The tips below follow his numbering, grouped so you can find one fast, with our own map and guide links where they help. If a tip matters to you, watch that part of his video before you rely on it, and subscribe to his channel if the list helps you.
Watch IceManIsaac's full video → IceManIsaac's channel on YouTube →
Tip 1 first: the Possum trait can bring a wiped player back
IceManIsaac opens with what he calls an absolute red alert. A player with the Possum trait can be downed, finished off, even see their whole squad wiped, and still sit and wait for as long as they like. Then they pop Possum, drop back into the last-stand state and use a self-revive or a tourniquet to stand up, either to grief you or to walk to an exfil. He likes it for a solo who wants a second chance. He doesn't like finding out the hard way. His counters: expect it, and put a claymore, trip wire or proximity mine on a body you suspect. If a body stays on the ground, he guesses its squadmates are still alive or spectating, because he thinks a body is replaced by a bag when someone disconnects. He calls that experimental and says an invisible bag may show up instead. Bait the player out, or strip the body: even dropping their kit on the floor makes a quick regain harder. Wing Mait note: operator contact callouts are in development. The idea is that a solid red diamond on the minimap (an enemy operator) gets a spoken callout and an outline diamond (an NPC) does not, so your eyes can stay on the body you just cleared. DMZ support is in development, so this is a plan and not a shipped feature.
Stash, mules and refills (tips 2 to 6)
2. Every operator has their own stash. IceManIsaac runs two operators and uses one as a mule for keys, resources and rare loot. Keep weapons and a vest off the mule: if you hit Ready Up on the wrong operator, the game warns that key items are missing before you deploy with the wrong kit. 3. Equipped plates, ammo, tacticals and lethals top up when you enter a raid. Backpack contents don't. Split a stack, equip the extras and they refill to two and two on entry, so your spares stay home for the next run. When you print a tactical or lethal at the FOB, print one and let the game fill the rest. 4. Be careful with survival kits at the FOB. Accepting them all can fill your inventory in one go. Use stash upgrades or a mule for the overflow. 5. Merge Stacks (right bumper on a controller) joins split stacks and gives space back. It works in a raid too, so merge before you decide something has to go. 6. A cash or diamond icon doesn't always mean sell-only. Regional combat notes read as cash items but count towards upgrades, and he is holding on to orange and purple documents for later. Park anything you're unsure of on a mule until you've checked the upgrade screen.
Cash, vendors and tracking (tips 7 to 9)
7. The bank has a cap, and selling past it gives no warning. IceManIsaac says you sell into the abyss and learned it the expensive way. The readout at the top of the screen shows your balance against the cap (his reads $1M), so look before a selling spree. 8. The vendor station restocks on a timer. He says 12 hours, then that stock can disappear after 12 or 24 hours, so he isn't sure which. Guns that are hard to find, like the Cronin Squall he plans to buy (otherwise a level 55 unlock), are worth grabbing while they're there. 9. Track what you're upgrading. Press Y or triangle on an upgrade to track it, and an icon marks matching items when you find them in a raid. R3 shows where those items are found, down to the kinds of location and the points of interest. Wing Mait note: our 3D printer recipes page lists the 14 recipes we have confirmed so far, with inputs and unlock levels, and the Hajin map pins the points of interest. Together they cover "what do I need" and "where do I go".
Weapons and operators (tips 10 to 13)
10. Check the cart before you confirm a blueprint build. If you own the Vault Edition or any skin bundle with a blueprint, the Buy New Weapon screen shows its build list. He says the first purchase of a blueprint build is free, even with five attachments, which can be worth $100,000 or $200,000 on a build. Read the total before you confirm, because another creator we covered reported a redemption that drained his funds. 11. Every attachment slot costs too. In his example a fifth slot is $50,000 on top of the attachment itself (a barrel at $4,725 in the cart). A four-attachment gun can be the cheaper build. 12. Attachments are shared inside a weapon class. Unlock a muzzle on one assault rifle and you unlock it on every assault rifle; the screen reads SHARED ATTACHMENT. He expects that to get new weapons off the ground quickly, and says DMZ levels carry over to multiplayer and Warzone. 13. Prestiging an operator (Y or triangle on the operator screen) adds a randomly rolled prestige trait that stacks, and wipes your other traits. He names Quick Fix, Possum and UAV Upgrade as strong rolls, plus Thermal Padding, which hides you from UAVs, and UAV towers that never expire. His plan is to max one operator first and prestige when money is plentiful. He isn't sure whether you can eventually choose your traits.
Claim your first blueprint copy → 10 checks before your next drop → Thermal optic reticles: all ten tested →
Deploying: free loadouts, secure slots, solo and insurance (tips 14 to 17)
14. A free loadout still deploys your operator. While testing graphics in free roam, IceManIsaac equipped the free kit assuming he'd lose nothing, went in as his own operator, died, and paid about $100,000 to recover him. Free means free gear, not a free operator. If you plan a free-loadout run, such as the one in our Chang-san loot route guide, read this first and check what dying would cost your operator. We haven't tested that. 15. Secure slots protect an item if you die. Press square or X to send an item there. Most bags have one or two, and he thinks some have up to four. Put your keys in one, so a failed run doesn't cost you the key to a locked room. 16. You can deploy solo. There is no solo button: queue as one person and turn Squad Fill off at the bottom of the deploy screen (left trigger on a controller). You may still meet trios. 17. Insurance has three slots each for your operator and your loadout, shown on the deploy screen. A slot is used on entry even if you extract, and he doesn't know how they refill. The loadout tooltip reads "Insures all equipped weapons. They will be returned to the Stash if held upon death."
Regain: free kit to extraction → Chang-san loot route, 3 buildings → The Doctor's Tempered Vest recipe →
Moving and looting (tips 18 to 25)
18. Watch the stamina bar at the bottom centre. When it turns red you can't tactical sprint until you use an energy drink or smelling salts, and an icon shows how long the effect lasts. He took ages to notice it. 19. You can use a consumable without picking it up. The loot card offers Use, Secure, Backpack and Ping, so crack the energy drink from the container and keep your backpack for better loot. 20. Anything highlighted red goes in a secure slot. 21. Weapon manuals unlock a gun in the Gunsmith, so you can buy it whenever you like instead of relying on vendors or the floor. He believes three manuals of the same gun earn a gold camo. He says you can't hand a manual to a squadmate after exfil, so share it during the raid. 22. Crafting blueprints are the other rare find. He says they let you craft UAVs, trophy systems, tacticals, lethals, utilities and killstreaks at your base, which we take to mean the 3D printer recipes. 23. Story missions have their own item slots. Mission keys and items don't use backpack space, so if you can't find one, it's tucked away there. 24. Scrapping happens as you loot. Materials go straight into one of four resource slots, which is why loot seems to vanish from a locker, and you can't scrap anything at the FOB or from your inventory later. 25. Loot the operator as well as the backpack. Bodies can carry cash, plates, parachutes and gas masks, and he sees squadmates leave $2,000 on a body.
First look: HUD, loot and threat → Re-Education Center loot route →
Staying alive: threat, healing and caches (tips 26 to 29)
26. Threat level is not wanted level. The threat tag for an area describes PvE difficulty, not nearby players: an air base might be extreme and a village medium. The wanted level, top right, rises as you kill enemies who aren't operators, and may bring search parties. 27. Health regenerates, but plates are manual, and gel vests refill plates for you. Getting up with a tourniquet leaves you wounded: a red bar lowers your base health, bandages or a stim only raise it for a while, and a medkit clears it. A self-revive, a teammate's revive, a self-revive gun or a defibrillator won't leave you wounded. 28. Clinics, marked with a cross, are an almost guaranteed medkit spawn. 29. Use the armor and ammo caches. They refill every 60 seconds, so make laps instead of burning the supply boxes you may need when you're stranded. Wing Mait note: our Hajin map has layers for clinics and ammo and armor caches that we fill in as locations are confirmed, and our HUD guide covers the threat tag and what we plan to say from it.
Movement and exfil (tips 30 to 32)
30. Equip your parachute. One in the backpack does nothing, and it won't move into the equipped slot by itself, so check before any jump. 31. Helicopters and SAM sites. He says avoid the downtown SAM sites, the air base and anyone who has hacked a SAM site. The missile travels at what he calls hypersonic speed, so pop flares the moment it launches, and fly well clear of enemy SAM sites shown on your minimap. 32. Radiation spreads from the yellow circle you see at the start of the map out towards the edge, which also hints at where the final exfil will be. At an exfil a solo player gets a 5-second countdown. A duo or trio starts at about 30 to 45 seconds until everyone is in, then drops to 5, and someone stepping on and off can make the timer disappear. Be ready to step in together. Wing Mait note: he says "the air base" without naming it. We take that to be Chang-san Air Base, the only air base on our Hajin map, so that's the pin we link.
What we haven't confirmed
We haven't re-tested these ourselves. This page follows IceManIsaac's footage and captions on the early-access build. How Possum bodies behave (bag or body, how long a downed player can wait) is his own experiment, not a rule. Vendor restock timing: he says 12 hours and 24 hours in the same breath. Insurance refill: he doesn't know either. The gold camo for three manuals of one gun and the free first blueprint purchase are his understanding. Check them in game. Whether a free loadout in a story mission puts your operator at risk, as it did in his free-roam test. Costs and timers are early-access numbers and may change.
Why this matters for Wing Mait
Most of these tips come down to reading the screen at the right moment: the Ready Up warning, the bank readout, the stamina bar turning red, the threat tag, the wounded bar and the exfil countdown. That is the kind of on-screen text Wing Mait reads so it can speak up for you, and your eyes stay in the fight. Wing Mait for MW4 DMZ is in development. It is a tactical voice system that watches the screen only: it doesn't read game memory, inject anything or send inputs to the game. IceManIsaac also mentions his advanced graphics settings guide, and we cover his baseline in our graphics guide.
Graphics: visibility and raid FPS → Wing Mait packs for MW4 →
Source briefing
Tips and quotes: IceManIsaac, "30+ GAME CHANGING DMZ Tips I Wish I Knew Sooner" (YouTube, 23 October 2026), 24 minutes 1 second. The wording is ours, paraphrased from his captions and checked against his footage; prices and menu text are as he shows them on screen. Please watch his full video for the demonstrations. We also covered his first look at the DMZ HUD. StoneMountain64 published a 37-tip list the same day, and our StoneMountain64 guide compares the two lists. Thank you to IceManIsaac for putting this list together.
Watch IceManIsaac's full video → IceManIsaac's channel on YouTube → First look: HUD, loot and threat → MW4 DMZ 37 tips from StoneMountain64 →
SOURCE BRIEFING
Source video from IceManIsaac30+ GAME CHANGING DMZ Tips I Wish I Knew Sooner
Watch on YouTubePlaying loads YouTube. Choose captions in the player settings. Credit and thanks to the creator.
Related field notes
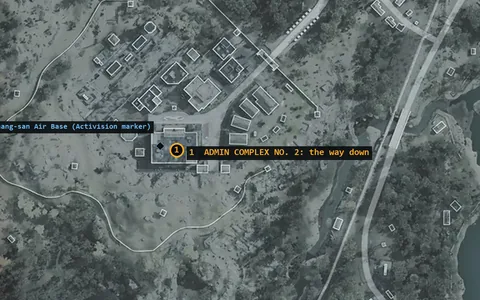 MW4 DMZ25 Oct 2026MW4 DMZ farming: Chang-san bunker run (patched)Patched on 25 October 2026 and no longer works. TheGigaDad's MW4 DMZ farming Short as a guide, kept for reference: Operation Iron Citadel, Chang-san Air Base, the Door Breacher Charge and the bunker weapon lockers, pinned on our Hajin map.FIELD NOTE 24
 MW4 DMZ3 Nov 2026Season 1: we are ready to dropJGOD, IceManIsaac and two official trailers have us hyped for more DMZ and our first Season 1 Warzone drops.FIELD NOTE 25
 MW4 DMZ22 Oct 2026Regain: free kit to extractionTheSpazo rebuilds from a free loadout with train loot, found keys and opportunistic boss drops. Keep an exit plan as the bag improves.
Sources
Numbers and mechanics on this page are paraphrased from:
Wing Mait is an independent project, not affiliated with or endorsed by Activision. Wing Mait for MW4 DMZ is in development and has not been released.